Managing web hosting can sometimes feel like navigating a maze. For anyone running a web hosting business or managing a server, understanding how to modify cPanel accounts within WHM (Web Host Manager) is one of those core skills that can make your life easier.
Whether you’re adjusting resources, upgrading a plan, or managing user limits, modifying a cPanel account is an essential task for every system administrator. But if you’re new to WHM or just looking for a refresher, it can feel a bit daunting at first.
In this guide, we’ll walk you through everything you need to know about modifying a cPanel account in WHM. We’ll cover why and when you might want to modify accounts, detailed steps on how to do it, and a few handy tips to make the whole process smoother.
Plus, we’ll break down the process so it feels less technical and more like something you can handle confidently.
What is WHM and Why Modify a cPanel Account in WHM
First things first—what is WHM, and why would you need to modify a cPanel account? WHM is the go-to tool for server administrators, allowing you to create, manage, and modify multiple cPanel accounts on one server. A cPanel account is basically a user profile linked to a website or domain, and it comes with its own resources (like disk space, bandwidth, and email accounts).
Modifying cPanel accounts can come in handy in a variety of situations. Here are a few common reasons you might need to do it:
- Upgrading or downgrading the user’s hosting package: If a customer’s website grows and needs more resources, you can upgrade their package without moving their account.
- Adjusting resource limits: You may need to increase bandwidth, add more disk space, or change the number of email accounts they’re allowed.
- Managing account permissions: Need to grant or restrict SSH access, or adjust CGI permissions? This is the place to do it.
- Updating contact information: The account holder might need to change their primary email or other contact details.
Knowing how to make these adjustments allows you to provide better customer service, keep your clients happy, and ensure your server is running smoothly.
Step-by-Step Guide to Modifying a cPanel Account in WHM
Ready to dive in? Let’s take a step-by-step look at how to modify a cPanel account in WHM. Don’t worry—it’s easier than it sounds, and I’ll walk you through it so you feel confident at every step.
Step 1: Log into Your WHM Dashboard
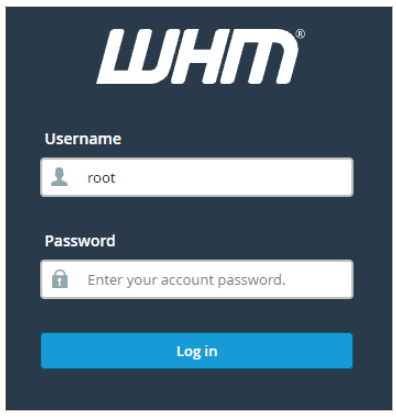
Start by logging into WHM. You’ll typically find the login page at a URL like this: https://yourdomain.com:2087/. If you’re not sure what your WHM login URL is, ask your hosting provider.
- Open your preferred web browser.
- Enter the WHM URL, then type in your WHM username and password.
- Click Log in.
Once you’re in, you’ll see the WHM dashboard, which gives you access to all of the server management tools. Think of it as the command center for your web hosting operations.
Step 2: Find the “Modify an Account” Tool
Once you’re in the WHM dashboard, you can use the search bar to quickly locate the tools you need. To modify a cPanel account, follow these steps:
- In the left-hand sidebar, find the search bar.
- Type in Modify an Account, and click on the corresponding link.
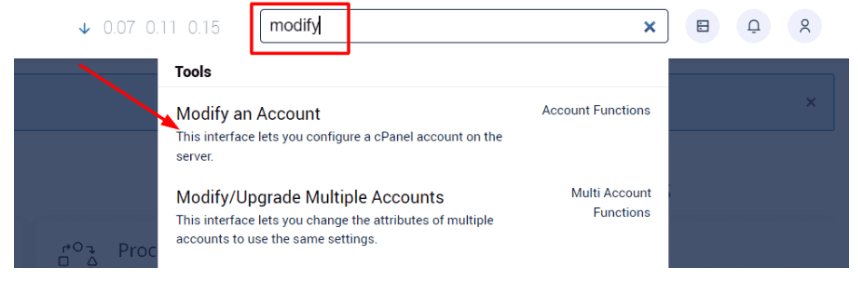
You’ll be taken to a page that lists all the cPanel accounts on your server, along with their domains, usernames, and IP addresses.
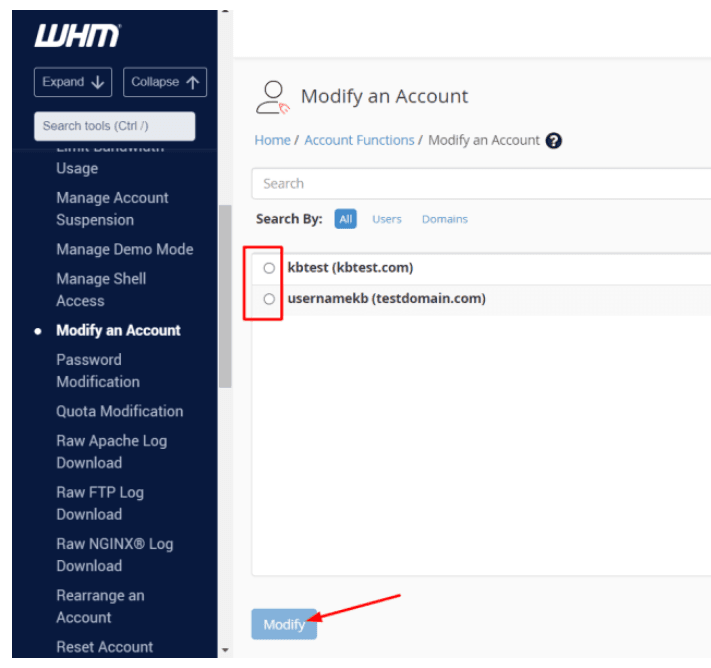
Step 3: Choose the cPanel Account You Want to Modify
On the account list page, locate the specific cPanel account you need to modify. If you have a long list of accounts, you can use the search bar to find it by the domain name or username.
- Scroll through or search the list until you find the correct account.
- Click on the domain name or username to select it.
- Once the account is selected, click Modify to open the modification options.
Step 4: Adjust the Account Settings
Now that you’re in the account modification section, you’ll see a variety of settings you can adjust.
Here’s a breakdown of each major section and what you can do:
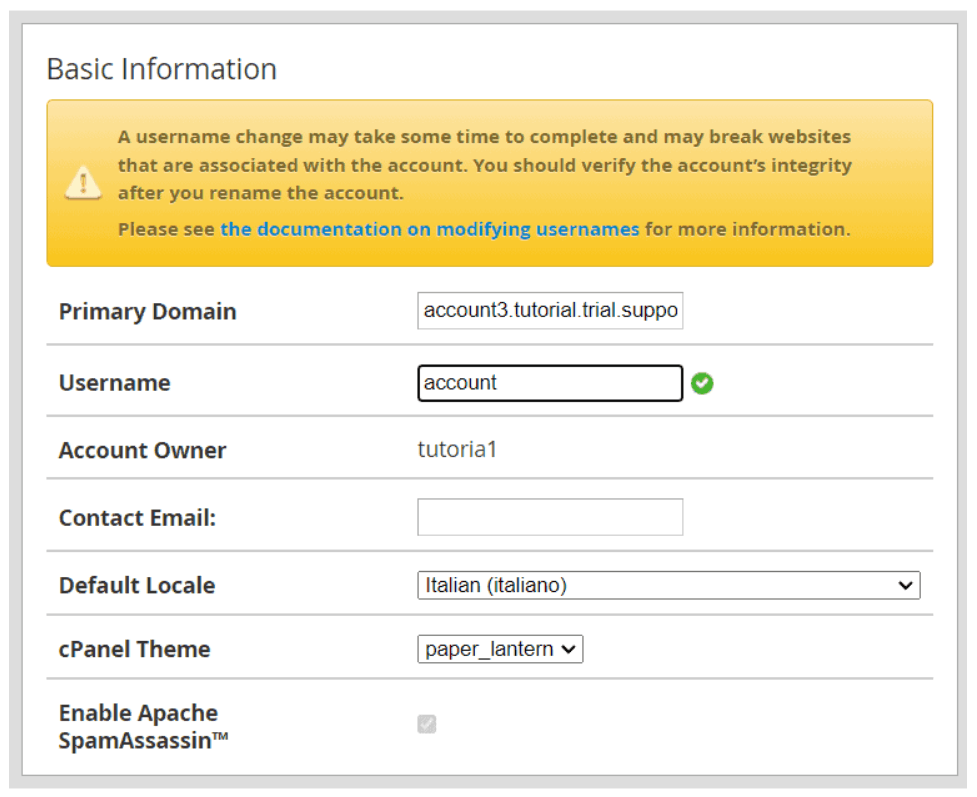
1. Domain Name
If your customer has changed their primary domain, you can update it here. Changing the domain name can affect services associated with the account, so make sure the customer understands the potential impacts, like downtime or email issues, before you make this change.
2. Contact Email Address
This is the primary email address linked to the account. It’s where WHM sends important notifications like resource overages, login details, or account warnings. Keeping this updated ensures your clients are always in the loop.
3. Resource Limits (Package Adjustments)
This is where you can modify the account’s resource allocation.
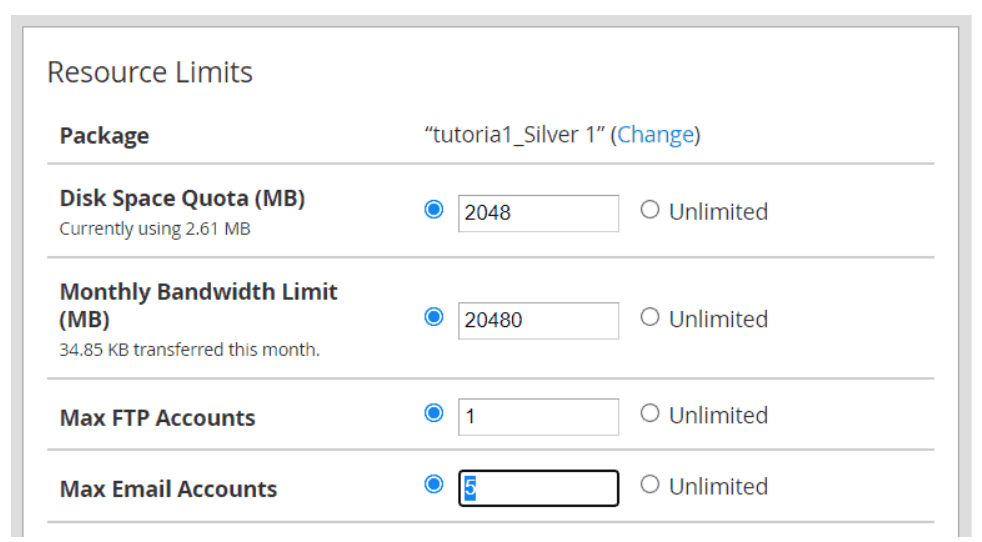
Some of the common settings include:
- Disk Space Quota: Set the maximum amount of storage for files, emails, and databases. Increasing disk space can help if a client’s website is growing quickly and using up storage.
- Monthly Bandwidth: Define the amount of data transfer allowed each month. If the account exceeds this, the website may be temporarily suspended, so it’s a good idea to monitor this for active sites.
- Max FTP Accounts: Control the number of FTP accounts (used for file transfers) associated with this cPanel account.
- Max Email Accounts: Specify how many email addresses the user can create.
- Max Databases: Set a cap on the number of databases the user can create, which is helpful for managing resource use.
- Max Subdomains/Add-on Domains: Set the limit for subdomains and add-on domains for that account.
- Max Parked Domains: Parked domains are essentially aliases for the main domain, and here you can control their number.
4. Account Permissions
Sometimes, you need to change the permissions associated with an account. Here’s what you can modify:
- Shell Access: Toggle SSH (Secure Shell) access. This allows the user to remotely access the server using a command line, which is useful for advanced users.
- CGI Access: Allow or disable the use of CGI scripts. CGI scripts are commonly used for web forms and other interactive site features.
- Dedicated IP: Assign or remove a dedicated IP address. A dedicated IP can improve site performance, particularly if a client is running an e-commerce site.
Step 5: Save Your Changes
After you’ve made the adjustments, it’s time to apply the changes and save them.
- Scroll down to the bottom of the page.
- Review all the changes you made to ensure everything is correct.
- Click Save to apply the changes to the cPanel account.

Post-Modification: Verifying Your Changes
Once you’ve modified the account, it’s a good idea to verify that the changes have been applied properly. Here are a few ways to do this:
- Check Disk Usage: Log into the cPanel account to verify the new disk space limits. This will help you see if the user now has the storage space they need.
- Test Email Creation: If you increased the number of email accounts, try creating a new email address to ensure the updated limit is working.
- Domain Changes: Visit the website to make sure it resolves correctly with any new domain settings you applied.
Best Practices for Modifying cPanel Accounts in WHM
Now that you know how to modify cPanel accounts, here are some best practices to keep in mind:
1. Monitor Resource Usage Regularly
Monitoring helps you proactively address potential issues. By keeping an eye on disk space, bandwidth, and other resources, you can spot accounts that are approaching their limits and modify them as needed.
2. Back Up Accounts Before Making Major Changes
Always back up the cPanel account before modifying key details, such as the domain name or email settings. This way, if anything goes wrong, you can quickly restore the account without losing data.
3. Communicate with Clients
Modifying an account can have immediate effects on the client’s website. It’s good practice to notify your clients before making significant changes, especially those related to downtime or domain adjustments.
4. Use Packages to Simplify Management
If you offer tiered hosting plans, consider creating packages that define specific resource limits. This can make it quicker and easier to modify accounts without manually adjusting each setting.
Final Thoughts
Managing cPanel accounts through WHM doesn’t have to be overwhelming. By following the steps outlined in this guide, you can easily modify accounts to fit your client’s needs and keep your server running smoothly.
Whether you’re adjusting disk space for a growing website, upgrading a hosting plan, or customizing account permissions, these tools allow you to manage your hosting business with confidence.
Embracing these techniques not only improves customer satisfaction but also helps you maintain a well-organized, reliable hosting environment. With these skills in your toolkit, you’ll be better equipped to handle any hosting challenges that come your way. Happy hosting!