Editing an account level (global) email filter in cPanel allows you to modify the rules that affect all email accounts under your domain. Here’s a detailed guide on how to edit an account level/global email filter in cPanel for Host4Geeks users:
Step-by-Step Guide to Editing an Account Level/Global Email Filter in cPanel
1. Log into cPanel
Open your web browser and enter the cPanel login URL provided by Host4Geeks, typically https://yourdomain.com/cpanel or https://yourdomain.com:2083.
- Login Credentials
Enter your cPanel username and password to log in.
2. Navigate to the Email Filters Section
- Email Filters
Once logged into cPanel, scroll down to the “Email” section.
- Global Email Filters
Click on the “Global Email Filters” icon. This section manages filters that apply to all email accounts under your domain.
![]()
3. Locate the Filter to Edit
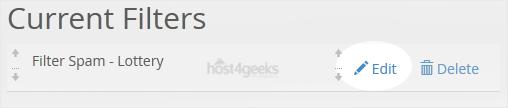
- List of Filters
In the Global Email Filters interface, you will see a list of all existing account-level email filters.
- Select Filter
Locate the filter you want to edit. Filters are listed by name or by the criteria they apply. If you have many filters, you may need to scroll through the list to find the one you need.
4. Edit the Filter
- Edit Option
Next to each filter, there will be options to “Edit” or “Delete.” Click the “Edit” link next to the filter you wish to modify.
- Modify Criteria
In the filter editing interface, you can modify the criteria that trigger the filter. This might include changing the rules for subject, sender, recipient, or any other condition.
- Modify Actions
You can also change the actions that are performed when the filter criteria are met. Common actions include redirecting the email, discarding it, or sending a copy to another address.
5. Save the Changes
- Save Filter
After making the necessary changes, click the “Save” button to update the filter. Ensure all changes are correctly entered before saving.
- Verification
Double-check the filter list to ensure your changes have been applied correctly. The filter should now reflect the updated criteria and actions.
Additional Tips for Managing Email Filters
- Test Filters: After editing a filter, it’s a good practice to send test emails to ensure the filter works as expected.
- Organize Filters: If you have multiple filters, organize them in a logical order. Filters are processed sequentially, so the order can impact how emails are handled.
- Regular Review: Periodically review your email filters to ensure they are still relevant and working as intended.
Troubleshooting
- Changes Not Applied: If the changes do not seem to take effect, refresh the page and check again. Make sure you have saved the filter correctly.
- Filter Conflicts: Ensure that your filters do not conflict with each other. Conflicting filters can cause emails to be processed incorrectly.
Contacting Support
For any issues or additional help, you can reach out to Host4Geeks customer support through:
- Support Portal: Access the support portal from your Host4Geeks account.
- Live Chat: Use the live chat feature on the Host4Geeks website.
- Email: Send an email to the Host4Geeks support team.
By following these detailed steps, you can effectively edit an account level/global email filter in cPanel on Host4Geeks, ensuring your email management rules are up-to-date and functioning as desired.