Web hosting control panels are essential tools for managing a website’s backend operations. They provide a graphical interface to simplify tasks such as managing domains, emails, databases, and server configurations. This guide will walk you through the basics of web hosting control panels, how to use them, and how they enhance the efficiency of web hosting management.
What is a Web Hosting Control Panel?
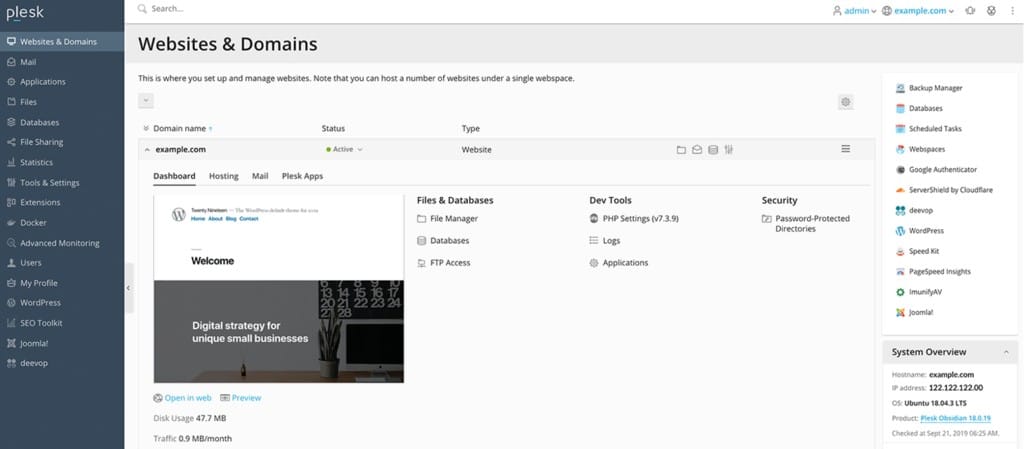
A web hosting control panel is a web-based interface provided by hosting companies that allows users to manage their servers and hosted services. The most popular control panels are cPanel, Plesk, and DirectAdmin, each offering a range of features to simplify server management.
Key Features of Web Hosting Control Panels
- Domain Management: Add, remove, and manage domains and subdomains.
- Email Management: Create and manage email accounts, forwarders, and autoresponders.
- File Management: Upload, download, and manage website files using a file manager.
- Database Management: Create and manage databases using tools like phpMyAdmin.
- Security Features: Manage SSL certificates, configure firewalls, and implement other security measures.
- Backup and Restore: Schedule automatic backups and restore data when needed.
- Software Installation: One-click installation of popular applications like WordPress, Joomla, and Drupal.
- Resource Monitoring: Track server resource usage like CPU, memory, and disk space.
Step-by-Step Guide to Using Web Hosting Control Panels
Step 1: Accessing the Control Panel
- Login Information: After purchasing a hosting plan, you’ll receive login credentials for the control panel.
- Login URL: Navigate to the control panel login URL provided by your hosting company. This URL typically looks like https://yourdomain.com/cpanel for cPanel or https://yourdomain.com:8443 for Plesk.
- Enter Credentials: Enter the username and password provided.
Step 2: Domain Management
- Add a Domain: Look for the “Domains” section. In cPanel, click “Addon Domains” to add a new domain.
- Manage Subdomains: Select “Subdomains” to create a subdomain like blog.yourdomain.com.
- DNS Management: Use the “DNS Zone Editor” to add or modify DNS records.
Step 3: Email Management
- Create an Email Account: Navigate to the “Email Accounts” section. Enter the email address and password.
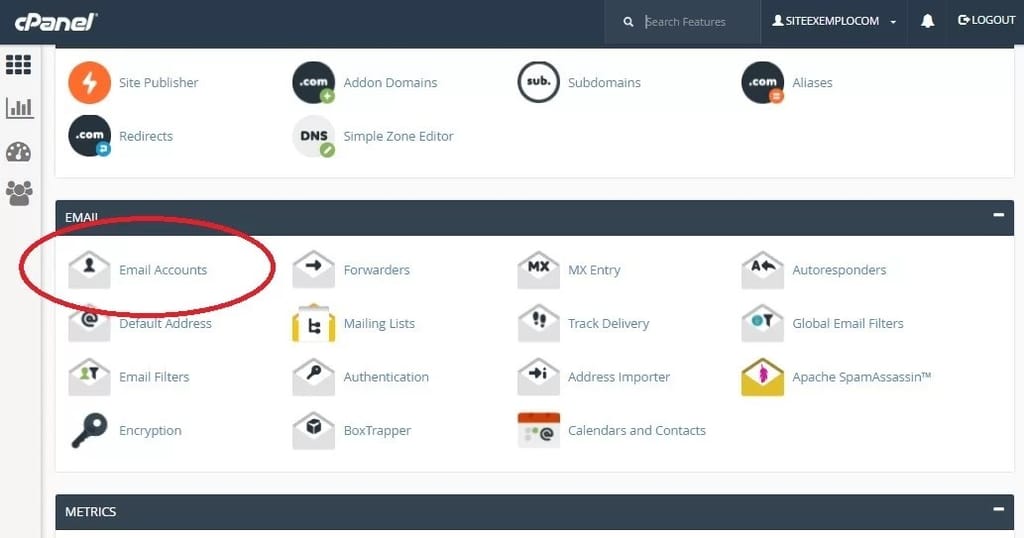
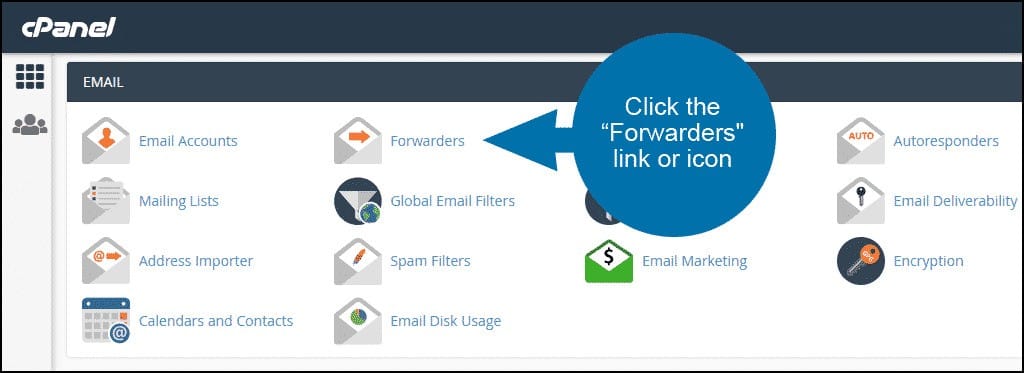
- Set Up Forwarders: Go to “Forwarders” to forward emails from one address to another.
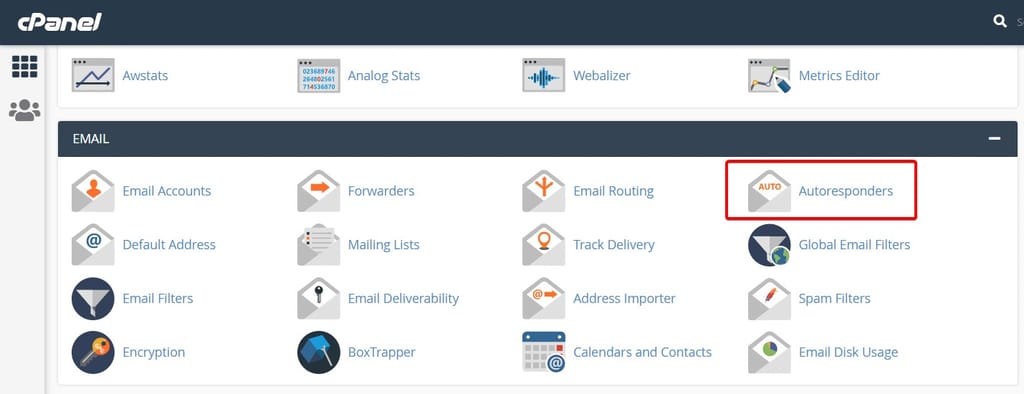
- Configure Autoresponders: Use “Autoresponders” to set up automatic reply messages.
Step 4: File Management
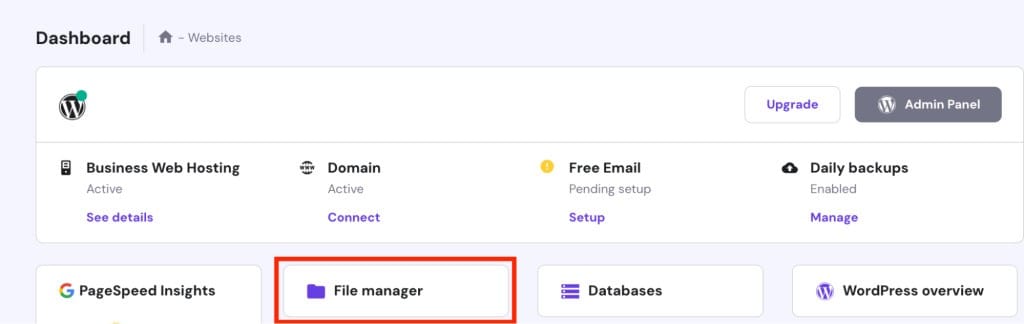
- Access File Manager: Click on “File Manager” to view and manage website files.
- Upload Files: Use the upload feature to add files to your website.
- Edit Files: Right-click on a file to edit it directly within the control panel.
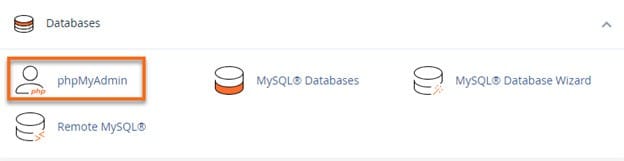
Step 5: Database Management
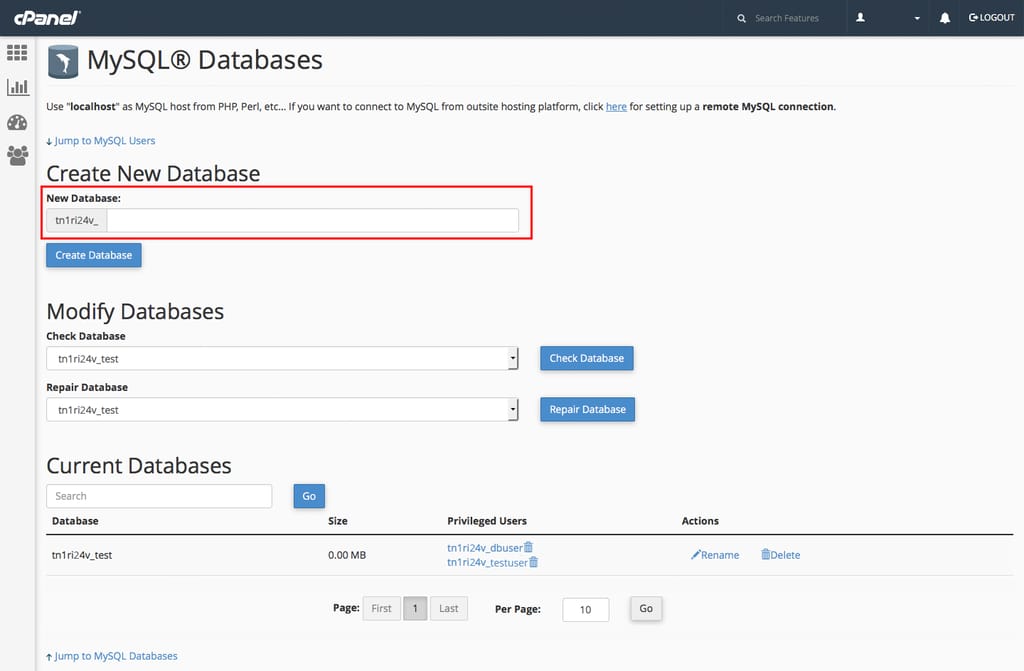
- Create a Database: Go to “MySQL Databases” to create a new database.
- Manage Users: Add users and assign them to databases.
- Use phpMyAdmin: Access phpMyAdmin to manage your databases, run queries, and import/export data.
Step 6: Security Features
- Install SSL Certificates: Navigate to “SSL/TLS” to install SSL certificates for your domains.
- Configure Firewalls: Use the security section to configure firewall rules.
- Set Up Password Protection: Use “Directory Privacy” to password-protect certain directories.
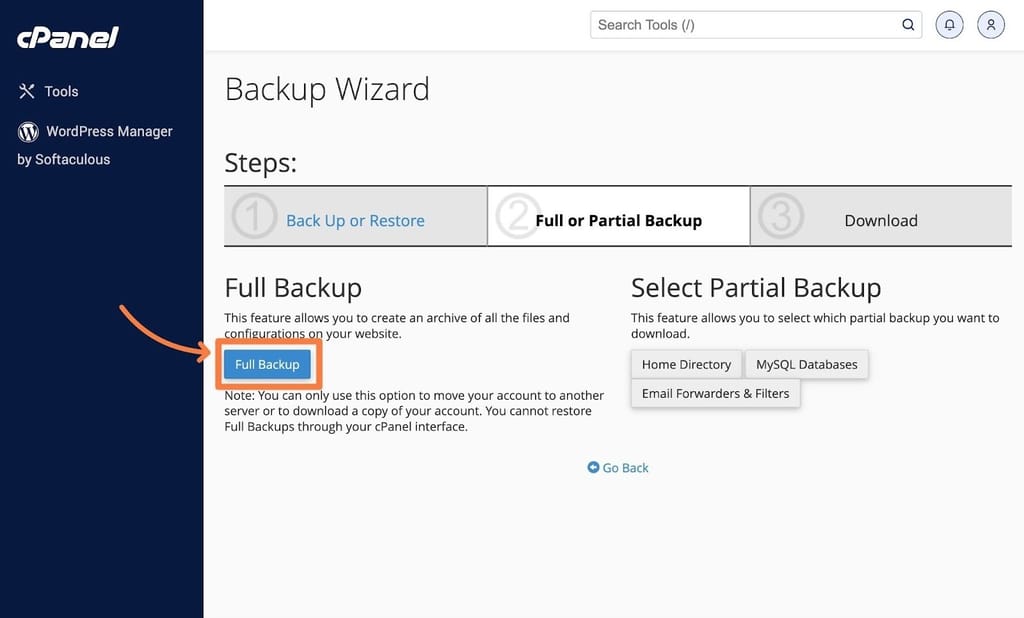
Step 7: Backup and Restore
- Create Backups: Use the “Backup” tool to create manual backups of your website.
- Schedule Automatic Backups: Set up automatic backups if your control panel supports it.
- Restore Data: Use the “Restore” feature to recover data from backups.
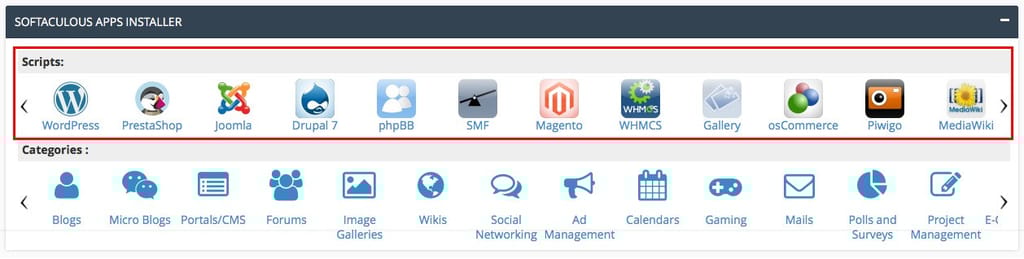
Step 8: Software Installation
- Access One-Click Installers: Use tools like Softaculous or Installatron, usually found under “Software” or “Apps”.
- Select an Application: Choose the software you want to install, such as WordPress.
- Follow Installation Steps: Complete the form with details like site name, admin user, and password, then click “Install”.
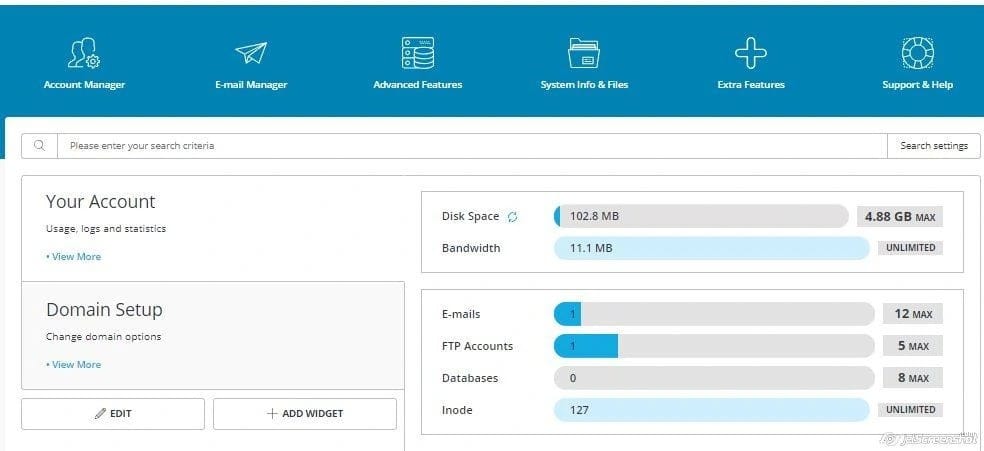
Step 9: Monitoring Server Resources
- Check Resource Usage: Look for sections like “CPU and Concurrent Connection Usage” or “Resource Usage”.
- Monitor Bandwidth: Track how much bandwidth your site is consuming.
- Review Disk Space: Ensure you have sufficient disk space for your website and emails.
Benefits of Using Web Hosting Control Panels
Web hosting control panels are indispensable tools for website management, offering a range of benefits that enhance usability, efficiency, and functionality. Here’s a detailed look at the key benefits of using web hosting control panels:
1. User-Friendly Interface
Simplified Management
- Graphical Interface: Web hosting control panels provide an intuitive graphical user interface (GUI) that makes complex server management tasks accessible even to non-technical users.
- Drag-and-Drop Functionality: Many control panels offer drag-and-drop features for file management, making tasks like uploading and organizing files straightforward.
2. Centralized Control
All-in-One Management
- Single Dashboard: Manage domains, email accounts, databases, files, security settings, and more from a single dashboard, reducing the need to switch between different tools.
- Integrated Tools: Built-in tools for DNS management, SSL certificate installation, backup creation, and more ensure that you have everything you need in one place.
3. Time Efficiency
Automation and Streamlining
- One-Click Installations: Use one-click installers for popular applications like WordPress, Joomla, and Drupal, saving time and reducing manual setup errors.
- Automated Tasks: Schedule automated backups, updates, and maintenance tasks to keep your site running smoothly without constant manual intervention.
4. Enhanced Security
Robust Security Features
- SSL/TLS Management: Easily install and manage SSL certificates to ensure your site’s data is encrypted and secure.
- Firewall and Malware Scanners: Integrated firewalls and malware scanning tools help protect your site from cyber threats.
- Access Control: Set permissions and access controls to restrict unauthorized access to sensitive areas of your server.
5. Resource Monitoring
Real-Time Tracking
- Usage Statistics: Monitor CPU, memory, disk space, and bandwidth usage in real-time to ensure your server operates efficiently.
- Alerts and Notifications: Receive alerts if your resource usage exceeds specified thresholds, allowing you to take proactive measures.
6. Backup and Restore
Data Protection
- Manual and Automated Backups: Schedule regular backups and create manual backups as needed to protect your data.
- Easy Restoration: Restore your site to a previous state quickly and easily in case of data loss or corruption.
7. Domain and Email Management
Comprehensive Control
- Domain Management: Add, remove, and manage domains and subdomains effortlessly.
- Email Accounts: Create and manage email accounts, forwarders, autoresponders, and spam filters with ease.
8. Customization and Flexibility
Tailored Configuration
- Customizable Settings: Adjust server settings and configurations to meet your specific needs.
- Extensible Features: Install additional modules and plugins to extend the functionality of your control panel.
9. Software Management
Easy Application Handling
- Version Control: Manage different versions of software and ensure compatibility with your applications.
- Application Updates: Keep your applications up-to-date with automated updates and patches.
10. Scalability
Growing with Your Needs
- Resource Scaling: Easily upgrade your hosting plan or add more resources as your website grows.
- Multi-Domain Support: Host and manage multiple websites and domains from a single control panel, making it ideal for businesses with multiple web properties.
11. Support and Community
Reliable Assistance
- Technical Support: Hosting providers often offer technical support specifically for their control panel, providing expert help when needed.
- Community Forums: Access to community forums and knowledge bases where you can find solutions to common problems and share tips with other users.
Drawbacks of Web Hosting Control Panels
While web hosting control panels offer numerous advantages, they also have certain drawbacks that users should be aware of. Here are some of the key drawbacks:
1. Learning Curve
- Complexity for Beginners: Despite their user-friendly interfaces, control panels can be overwhelming for complete beginners. The array of features and options might be confusing without proper guidance.
- Advanced Features: Understanding and using advanced features like DNS settings, SSL management, and cron jobs can be challenging.
2. Cost
- License Fees: Some control panels, such as cPanel and Plesk, require paid licenses. This can add to the overall cost of web hosting, especially for small businesses or personal websites.
- Add-ons and Extensions: Additional features or add-ons might also come with extra costs.
3. Resource Consumption
- Server Load: Control panels consume server resources, which might affect the performance of your website, especially on shared hosting plans or servers with limited resources.
- Overhead: The graphical interface and background services can add overhead to the server.
4. Security Vulnerabilities
- Target for Attacks: Being widely used, popular control panels are common targets for cyber-attacks. Security vulnerabilities in the control panel software can potentially expose your server to risks.
- User Error: Misconfiguration or incorrect settings by users can lead to security loopholes.
5. Limited Customization
- Fixed Features: Control panels come with a predefined set of features and options. Customizing or adding new functionalities that aren’t supported by the control panel can be difficult.
- Dependency on Updates: Users rely on control panel providers for updates and new features, which may not always align with individual needs or timelines.
6. Compatibility Issues
- Software Compatibility: Some control panels might not be compatible with certain software or scripts. This can limit the choice of tools and applications you can use.
- OS Dependencies: Certain control panels are designed to work with specific operating systems, which might restrict your choice of OS.
7. Vendor Lock-In
- Switching Costs: Migrating from one control panel to another can be cumbersome and time-consuming. This can lead to vendor lock-in, where you feel stuck with a particular provider due to the complexities involved in switching.
8. Performance Overheads
- Performance Impact: The control panel’s background processes and services can impact the overall performance of your server, potentially slowing down your website.
9. Lack of Advanced Features for Power Users
- Insufficient for Advanced Needs: For highly experienced users or those with complex requirements, control panels may not offer the granular control or advanced features that are available through command-line interfaces or custom scripts.
Conclusion
Web hosting control panels are powerful tools that make managing your website and server more accessible and efficient. By following this guide, you should be able to navigate your control panel, perform essential tasks, and leverage its features to maintain and grow your online presence. Whether you’re a beginner or an experienced webmaster, understanding how to use these control panels effectively can significantly enhance your web hosting experience.