
Experiencing a sudden invasion of traffic can be both exciting and daunting, especially if you’re using a shared server. Managing these traffic peaks effectively is crucial to maintaining a smooth user experience and avoiding downtime. In this article, we’ll explore top strategies for handling traffic spikes on a shared server, outlining each step in detail along with the benefits and drawbacks.
1. Optimize Your Website’s Performance
Step-by-Step Process:
Minimize HTTP Requests:
- Combine Files: Merge CSS and JavaScript files.
- Use CSS Sprites: Combine images into one file.
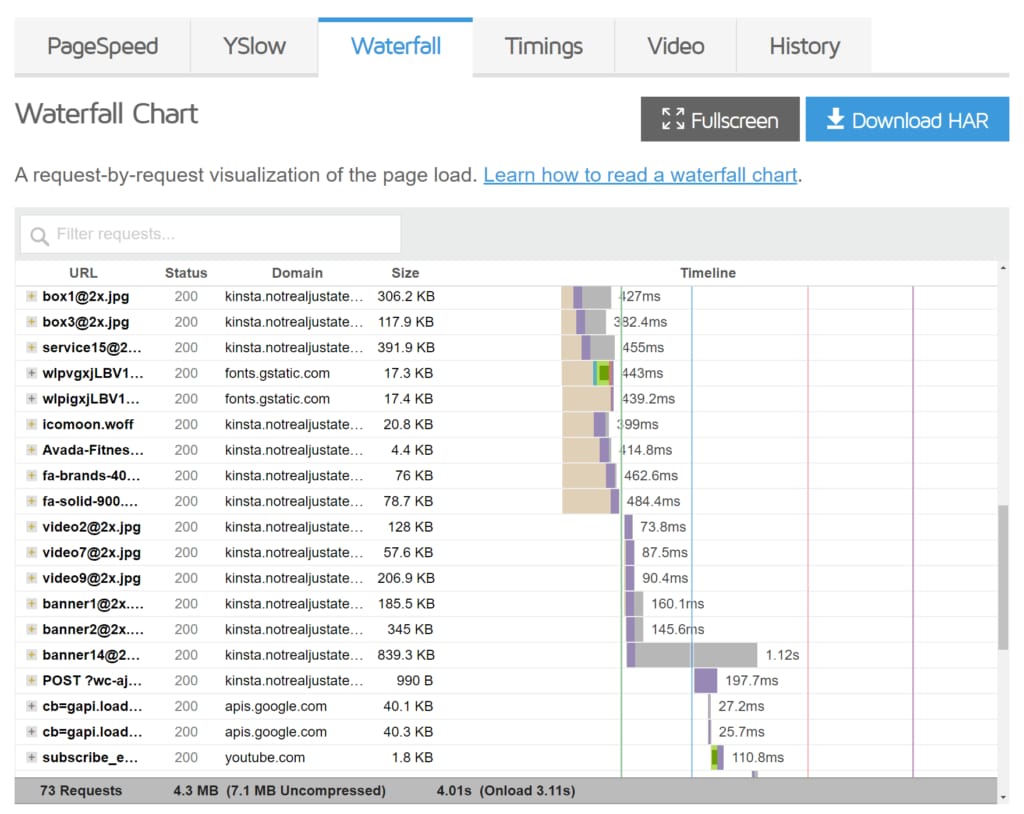
Enable Compression:
- Gzip Compression: Compress files to reduce their size.
Optimize Images:
- Use Appropriate Formats: JPEG for photos, PNG for graphics.
- Compress Images: Use tools like TinyPNG or ImageOptim.
Leverage Browser Caching:
- Set Expiry Headers: Define how long browsers should cache images, CSS, and JavaScript files.
Benefits:
- Improved Load Times: Faster load times lead to better user experience and SEO rankings.
- Reduced Server Load: Optimized performance means fewer resources are used, handling more traffic efficiently.
Drawbacks:
- Initial Setup Time: Optimization requires an initial time investment.
- Potential Breakages: Incorrect optimization can cause website elements to break.
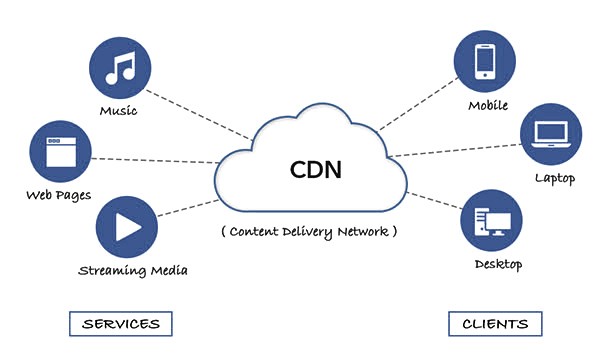
2. Implement a Content Delivery Network (CDN)
Step-by-Step Process:
Choose a CDN Provider:
- Popular options include Akamai, and Fastly.
Configure Your CDN:
- Update DNS Records: Point your domain to the CDN.
- Configure Caching Rules: Set up how and when content is cached.
Test and Monitor:
- Use tools to ensure the CDN is correctly serving content.
Benefits:
- Reduced Latency: CDNs store copies of your website on servers worldwide, decreasing load times.
- Offloaded Traffic: Lessens the load on your primary server.
Drawbacks:
- Additional Cost: CDNs come with a price, which can vary based on usage.
- Configuration Complexity: Setting up a CDN may require technical expertise.
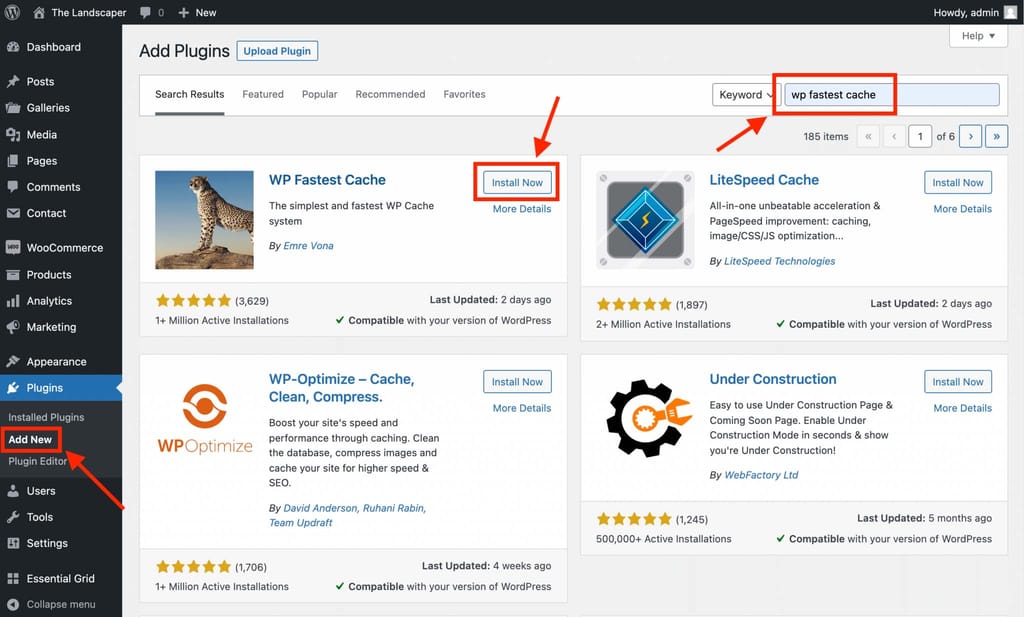
3. Implement Caching Strategies
Step-by-Step Process:
Install a Caching Plugin:
- For WordPress, consider plugins like W3 Total Cache or WP Super Cache.
Configure Cache Settings:
- Page Caching: Store static versions of pages.
- Object Caching: Cache database queries and API calls.
Use a Reverse Proxy:
- Consider using Varnish Cache or NGINX as a reverse proxy for additional caching.
Benefits:
- Improved Performance: Caching significantly speeds up website response times.
- Reduced Server Load: Cached content is served without hitting the backend server.
Drawbacks:
- Stale Content: Cached pages might not reflect recent updates.
- Setup Complexity: Advanced caching strategies can be complex to implement.
4. Optimize Database Performance
Step-by-Step Process:
Use Efficient Queries:
- Optimize SQL Queries: Ensure your queries are as efficient as possible.
Regular Maintenance:
- Database Indexing: Regularly index your database to speed up query times.
- Cleanup: Remove unnecessary data and optimize database tables.
Implement Database Caching:
- Use tools like Redis or Memcached to cache database queries.
Benefits:
- Faster Query Response: Optimized databases handle more queries faster.
- Improved User Experience: Quick database responses lead to faster page loads.
Drawbacks:
- Requires Technical Knowledge: Database optimization can be complex and require technical expertise.
- Potential for Errors: Incorrect optimization can lead to data loss or corruption.
5. Use Load Balancing
Step-by-Step Process:
Choose a Load Balancer:
- Options include hardware load balancers or software solutions like HAProxy.
Configure Load Balancer:
- Distribute Traffic: Set rules to evenly distribute traffic across servers.
- Health Checks: Monitor server health to reroute traffic from down servers.
Test and Monitor:
- Regularly test load balancing configurations to ensure optimal performance.

Benefits:
- Improved Reliability: Distributes traffic to prevent overloading a single server.
- Scalability: Easily add more servers to handle increased traffic.
Drawbacks:
- Increased Complexity: Load balancing adds another layer of complexity to your infrastructure.
- Higher Costs: Additional servers and load balancing solutions can be costly.
Benefits and Drawbacks of Managing Traffic Peaks
Benefits:
Enhanced User Experience:
- Smooth, fast-loading websites keep visitors engaged and reduce bounce rates.
Improved SEO Rankings:
- Faster websites rank higher in search engine results.
Increased Revenue:
- Better performance can lead to higher conversion rates and sales.
Scalability:
- Proper management allows your website to handle growth and traffic surges seamlessly.
Drawbacks:
Increased Costs:
- Implementing solutions like CDNs, load balancers, and additional servers can be expensive.
Technical Complexity:
- Advanced optimizations require technical expertise and ongoing maintenance.
Potential Downtime:
- Misconfigurations during optimization can lead to downtime or broken functionalities.
Resource Intensive:
- Initial setup and continuous monitoring require time and effort.
Conclusion
Managing traffic peaks on a shared server involves a combination of optimization techniques, caching strategies, load balancing, and more. Each method has its benefits and drawbacks, but when implemented correctly, they can significantly enhance your website’s performance, reliability, and scalability.
By understanding and applying these strategies, you can ensure your website remains robust and user-friendly, even during traffic surges.