Imagine you’ve just redesigned your website, updated some URLs, and maybe even merged a few pages. Now, you’re left wondering what happens to all the people who have bookmarked those old links or the SEO value you’ve worked so hard to build.
That’s where redirects come in handy! Setting up page redirects in WordPress is crucial not only for preserving your site’s SEO ranking but also for giving users a seamless experience.
In this guide, we’ll walk you through everything you need to know about managing redirects in WordPress—why they matter, the different types, and how to set them up. Let’s dive in!
What Exactly is a Redirect, and Why Does it Matter?
A redirect is like a digital signpost. When someone types in or clicks an old URL that no longer exists, a redirect points them to a new location. Think of it like a GPS rerouting you when there’s a roadblock—it’s a simple way to ensure your visitors find what they’re looking for.
Redirects are essential because:
- They keep your site visitors happy: If users land on a page that’s no longer available, they’re likely to leave your site. Redirects help you keep them engaged by automatically sending them to the right place.
- They protect your SEO: If you’ve worked hard to build up the SEO for a page, you don’t want to lose that traffic just because the URL has changed. Redirects preserve your “link juice” and prevent broken links from harming your rankings.
When Should You Use Redirects?
So, when should you set up a redirect on your WordPress site? Well, there are several scenarios where a redirect can save you from losing traffic or SEO value:
When you’ve updated a page URL
If you change a page’s URL to make it more user-friendly or SEO-optimized, you don’t want to lose visitors who may have saved the old link. A 301 redirect can point them to the new URL seamlessly.
When you’ve removed a page
Let’s say you’re tidying up old content and decide to delete a few outdated pages. Redirecting those old URLs to a relevant page or a custom 404 page can prevent users from landing on a dead end.
When consolidating content
Merging two blog posts or combining pages? Use a 301 redirect on the old page to send visitors straight to the new, combined content. This way, you keep all that juicy SEO power in one place!
When you’re migrating to a new domain
Moving your entire site to a new domain? A bulk 301 redirect from your old URLs to your new ones will help maintain your site’s traffic and SEO rankings during the transition.
The Different Types of Redirects You Should Know
There are a few different types of redirects, and each one has its purpose. Understanding the different types of redirects helps you decide which one is best for each scenario. Here’s a quick breakdown:
301 Redirect (Permanent Redirect)
A 301 redirect is used when a page has been moved to a new URL permanently. This tells search engines like Google that the content has a new, permanent home, and they should transfer the SEO value from the old page to the new one.
When to Use a 301 Redirect:
- When you change the URL structure of your site: For instance, if you switch from “/blog/post-title” to “/articles/post-title.”
- If you’ve deleted outdated content: Redirect to a relevant page instead of leaving users with a 404 error.
- When moving content to a new domain: If you’ve rebranded or switched to a new domain, 301 redirects are essential to retain traffic and SEO value.
302 Redirect (Temporary Redirect)
A 302 redirect is for temporary changes. It sends visitors to a new URL for a limited time but doesn’t transfer the SEO power from the old page to the new one. This type of redirect is perfect when you want to temporarily divert traffic while maintaining the SEO value of the original URL.
When to Use a 302 Redirect:
During temporary maintenance: If you’re updating a product page or making changes that’ll be complete soon, you can redirect users to a similar page for the time being.
- For A/B testing: Use a 302 to test different page designs without affecting the SEO ranking of the original page.
- Promotional content: You might want to temporarily redirect to a promotional landing page for an event or sale, returning visitors to the main page afterward.
307 Redirect (Temporary Redirect)
A 307 redirect is the HTTP/1.1 replacement for the 302 redirect, ensuring the method (GET, POST) is preserved during the redirection. If a visitor is submitting a form with a POST request, the 307 ensures that the request method remains intact when they are redirected.
When to Use a 307 Redirect:
- For strict temporary changes: Use a 307 if you’re absolutely certain the move is temporary and you want browsers to maintain the original request method.
- For server migrations: If a page is temporarily hosted elsewhere during maintenance, a 307 ensures that search engines know the original content will be back soon.
Meta Refresh Redirects
Meta refresh redirects are generally set up on the page itself rather than the server. This type of redirect typically includes a countdown timer before the user is redirected, which is not ideal for user experience or SEO. It can look something like this:
When to Use Meta Refresh Redirects:
Meta refresh redirects aren’t commonly used for SEO-friendly websites. They’re best suited for internal links or self-contained applications, where you want a short delay before the redirect. These should be used sparingly and avoided on essential website content as they can lead to poor user experiences and potential SEO penalties.
Managing Redirects in WordPress: The How-To Guide
Now that we’ve covered the what and why, let’s get into the how. Fortunately, WordPress makes it easy to set up and manage redirects with plugins, code, or even manual methods.
Managing redirects properly can help keep your site’s user experience smooth and SEO-friendly. Here are some approaches to help you set up, monitor, and maintain redirects:
Using Plugins to Set Up and Manage Redirects
WordPress plugins simplify redirect management, especially if you’re unfamiliar with coding. Here are three popular plugins to consider:
Redirection Plugin
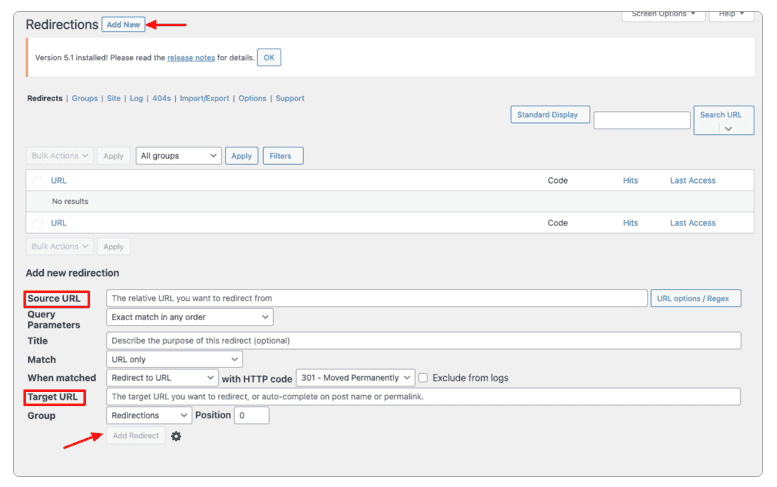
Free and easy to use, this plugin lets you create 301, 302, and 307 redirects directly from your WordPress dashboard. It also includes 404 error tracking, so you can quickly identify and redirect broken links. To use it:
- Install the Redirection plugin from the WordPress Plugin Directory.
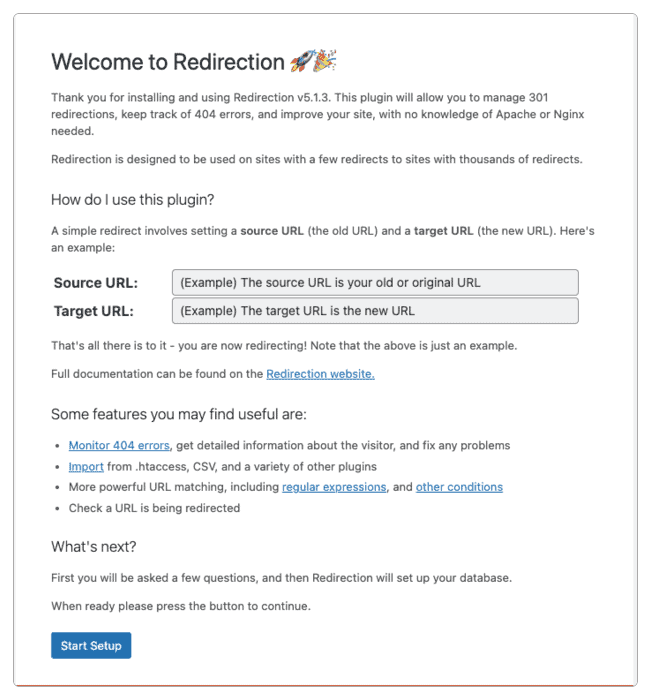
- Go to Tools > Redirection in your dashboard.
- Under the “Redirects” section, add the URL you want to redirect from, then enter the destination URL.
Yoast SEO Premium
If you already use Yoast for SEO, the premium version includes a redirect manager. This lets you set up redirects without leaving the Yoast interface. It also suggests redirects when you change a page URL, making it incredibly convenient.
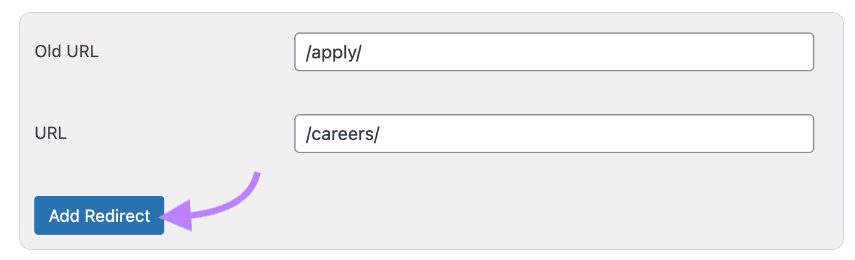
- After installing Yoast SEO Premium, go to SEO > Redirects.
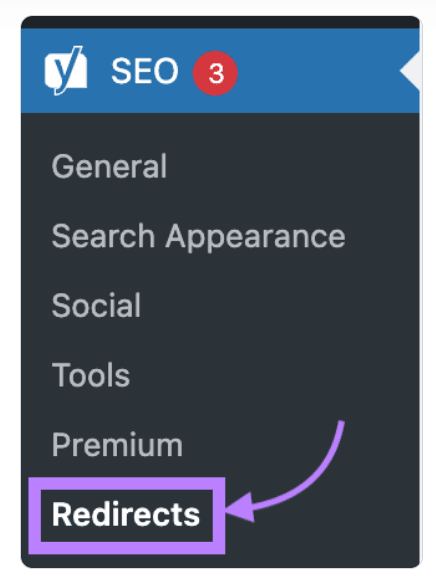
- Select the type of redirect (301 or 302) from the dropdown menu.
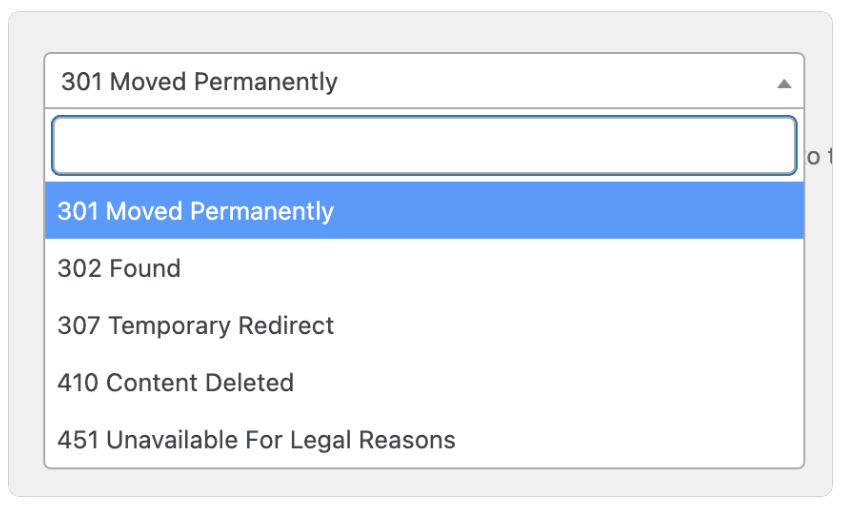
- Add the old URL and the new URL and then hit the “Add Redirect” button.
Simple 301 Redirects
This lightweight plugin is perfect if you only need to handle a few redirects. It’s ideal for small websites or quick fixes and doesn’t have a lot of extra features to manage.
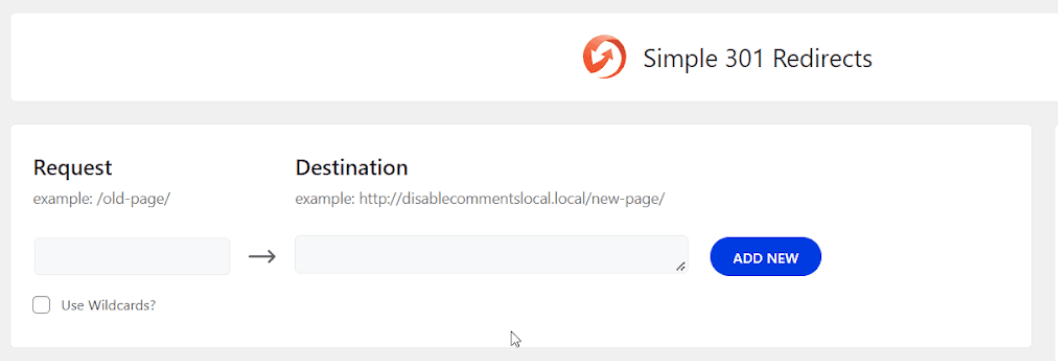
- Install the Simple 301 Redirects plugin, then go to Settings > 301 Redirects.
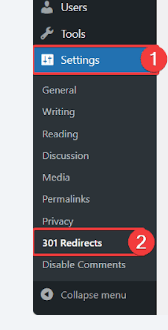
- Enter your old URL and new URL, then save the changes.
Editing the .htaccess File for Server-Side Redirects
If you’re comfortable with code, you can manage redirects by editing the .htaccess file. This file is located in your site’s root directory and controls how URLs are processed on your server.
To Access and Edit .htaccess:
- Use an FTP client like FileZilla to access your site’s root directory.
- Open .htaccess in a text editor and add your redirect rules.
Common Redirect Examples:
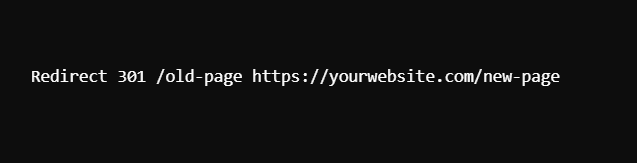
- 301 Redirect for a single page:
plaintext
- Redirect an entire directory:
plaintext
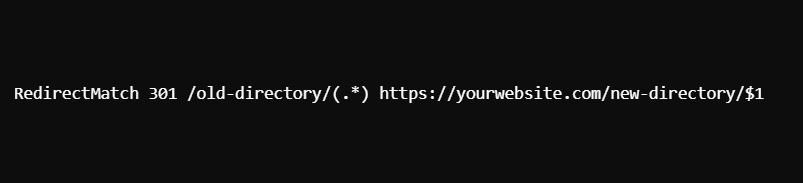
- Redirect using Regular Expressions: Great for complex redirects, such as redirecting any URL containing certain keywords.
- Be Careful: Make sure to back up the .htaccess file before making changes, as a small mistake can make your website inaccessible.
JavaScript Redirects for Situational Use
In some cases, you may not have access to server files or plugins. JavaScript redirects provide a workaround, although they’re generally not SEO-friendly. To implement a JavaScript redirect:
Add the following code to the <head> section of the old page:
javascript
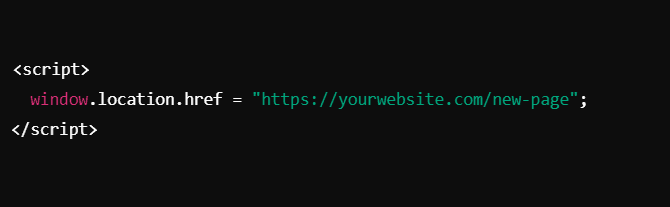
This will redirect visitors to the new page as soon as they land on the old one.
Monitor and Maintain Your Redirects
Redirects aren’t something you can set and forget. You’ll want to keep an eye on their performance and make adjustments as needed. Here’s how:
- Use Google Search Console: Go to the “Crawl Errors” section to monitor for any new 404 errors. This helps you catch broken links and redirect them promptly.
- Check Redirect Chains: Redirect chains can slow down your site. Use tools like Screaming Frog to identify chains and update your redirects to point directly to the final URL.
- Regularly Audit Your Site: Use a tool like SEMrush or Ahrefs to run a site audit and find any issues with redirects, 404 errors, or duplicate content.
Implement Best Practices for Redirect Management
Here are a few tips to make sure your redirects stay organized and effective:
Avoid Redirect Chains and Loops: Always redirect directly to the final destination URL. Redirect chains (A → B → C) slow down your site and can frustrate users. Similarly, redirect loops (A → B → A) create endless cycles that prevent visitors from accessing your content.
Set Up a Custom 404 Page: Even with redirects, some users may still land on a 404 page. Make it user-friendly by offering links to popular content, a search bar, or suggestions to help users find what they’re looking for.
Update Internal Links: Don’t rely solely on redirects. Update internal links to point directly to the new URL, which improves your site’s structure and minimizes the number of redirects required.
Final Thoughts
Managing redirects may sound technical, but it’s a simple way to keep your WordPress site running smoothly. By setting up proper redirects, you’re not only preserving SEO value but also ensuring your visitors have a seamless experience on your site.
Whether you use plugins, .htaccess, or JavaScript, there’s a solution that fits your needs and technical comfort level. Remember, regular monitoring and best practices like avoiding redirect chains will keep your site fast and user-friendly. So, take a few minutes to tidy up those redirects—you’ll be glad you did!