


DNS configuration on WordPress is centrally managed in the Settings > General menu. Here you can enter your Domain Name Server (DNS) information, such as name server addresses, for the domain associated with your WordPress site. It’s important to keep this information up-to-date and accurate in order to ensure that visitors are able to access your content. This can be done by consulting with your hosting provider or domain registrar to determine the correct nameserver information.
Additionally, you may need to update the DNS settings in order to use certain services such as email, CDNs, or other third-party services. It’s important to note that DNS configuration changes can take up to 48 hours to propagate across the Internet and be visible in the WordPress dashboard. You may need to contact your hosting provider if you need assistance with DNS configuration changes.
Understanding DNS Configuration
What is DNS?
DNS is the system that translates human-readable domain names like www.example.com into IP addresses that computers use to identify websites. DNS works behind the scenes, making it possible for users to access websites by typing domain names in web browsers rather than IP addresses.
Why is DNS Configuration Important?
DNS configuration is important for every website as it ensures that visitors can access the website through its domain name. Incorrect DNS settings can cause website downtime, leading to a loss of potential traffic and revenue.
How to Configure DNS?
DNS configuration can be done directly in the WordPress dashboard or through your hosting provider or domain registrar. In most cases, you will need to provide the correct nameserver information in order to point your domain name to the server where your website is hosted.
Tips for DNS Configuration:
It’s important to check the accuracy of your DNS configuration regularly as any changes can take up to 48 hours to propagate across the Internet. Additionally, you should be careful when making changes to your DNS configuration as incorrect settings can cause website downtime and other issues.
Finding DNS Configuration on WordPress
Subheading: Accessing DNS Settings on WordPress
To access DNS settings on WordPress, you need to log in to your domain registrar account. Domain registrars are companies that provide domain names registration services, such as GoDaddy, Namecheap, or Bluehost. Once logged in, look for the domain name you want to configure and navigate to the DNS management section.
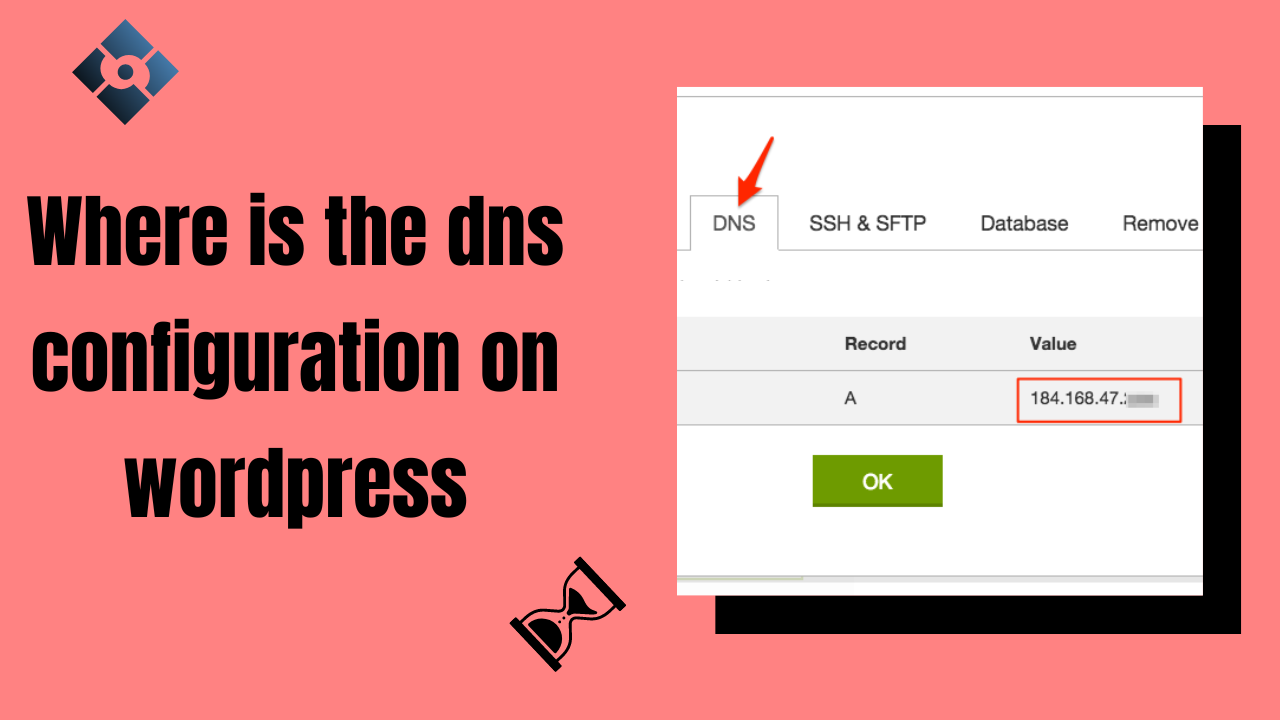
Configuring DNS on WordPress
Once you access the DNS management section, you will see various options to configure DNS settings. You can add or edit A records, MX records, CNAME records, and more. These settings determine how your domain name is mapped to your website’s IP address and how email is handled for your domain.
Using DNS Plugins on WordPress
If you’re not comfortable making DNS changes directly in your domain registrar account, you can use a DNS plugin on WordPress. Popular DNS plugins include WP DNS Manager and DNS Made Easy. These plugins offer a user-friendly interface that makes DNS configuration more accessible to non-technical users.
Troubleshooting DNS Configuration
If you’re having trouble with your DNS configuration on WordPress, it’s important to contact your hosting provider or domain registrar for assistance. In some cases, DNS changes can take up to 48 hours to propagate across the Internet and be visible in the WordPress dashboard. If you’ve waited longer than 48 hours and are still having trouble, contact your hosting provider or domain registrar to investigate the issue further.
Best Practices for DNS Configuration on WordPress
Use a Reliable DNS Provider:
It is essential to use a reliable DNS provider to ensure that your website is always accessible. Choose a reputable DNS provider with a proven track record of uptime and reliability.
Keep DNS Records Updated:
It’s important to keep your DNS records updated, especially when you change web hosts or move to a new server. Failure to update DNS records can result in website downtime, causing inconvenience to your visitors.
Implement DNS Security Measures:
DNS security measures like DNSSEC and DANE help to prevent DNS spoofing and other DNS-related attacks. Consider implementing these measures to safeguard your website’s DNS.
Monitor DNS Performance:
Monitor your website’s DNS performance regularly to identify any issues. Use a monitoring tool like Pingdom or Uptrends to track DNS performance and ensure that visitors can always access your site.
Regularly Back Up DNS Records:
Make sure to back up your DNS records regularly. This will help you quickly restore your website in the event of a disaster or data loss.
Use Third-Party DNS Services:
If your hosting provider does not offer reliable DNS services, consider using a third-party DNS service like Cloudflare or Dyn. These services can offer better performance and security for your website’s DNS configuration.
Conclusion:
DNS configuration is an essential part of managing a WordPress website. It’s important to keep your DNS records up-to-date and backed up regularly. Additionally, consider using reliable DNS providers and implementing security measures such as DNSSEC and DANE to protect your website from malicious attacks. Finally, use monitoring tools like Pingdom or Uptrends to track your website’s DNS performance. By following these best practices, you can ensure that visitors always have access to your WordPress site.


Leave a Reply