Setting up FreePBX on Linux – a modern, full-featured web interface for managing Asterisk VoIP telephony – is not difficult even for a casual user. All you need to do is follow the step-by-step instructions provided in our article on how to install FreePBX. We will go through all the important information regarding how to install and configure FreePBX on Linux, including the basic configuration needed for initial setup, and cover the basics and universal tips for smooth deployment along the way.
Introduction to IP PBX
An IP PBX (Internet Protocol Private Branch Exchange) is a modern phone system that uses internet protocols to manage and route calls within an organization. Unlike traditional PBX systems that rely on physical phone lines, an IP PBX connects users and devices over a local network or the internet, offering greater flexibility and scalability.
FreePBX stands out as a leading open-source IP PBX solution, providing a powerful graphical user interface (GUI) that simplifies the management of your phone system. With the FreePBX dashboard, users can easily configure extensions, manage call routing, and monitor system activity—all from a centralized web interface. This approach eliminates the need for complex manual configurations, making it accessible for both beginners and experienced administrators.
By leveraging FreePBX, organizations can connect multiple users, integrate with various VoIP providers, and customize their PBX to fit specific business needs. The open-source nature of FreePBX ensures ongoing community support and a wide range of add-ons, making it a flexible and cost-effective choice for any business looking to modernize its communications infrastructure.
To get started with your VoIP setup, it’s essential to know how to install freepbx effectively, ensuring your system is optimized for performance and reliability.
Why Do You Need FreePBX Interface?
The FreePBX interface simplifies VoIP telephony management and Asterisk configuration by presenting data visually.
The latest stable version of the package is FreePBX 17, which was released on 2 August 2024. Basically, this GUI allows you to control VoIP telephony and configure Asterisk software without relying on superior programming knowledge.
To configure FreePBX on Linux from scratch, the component must be installed either on the computer that will be used for VoIP telephony, or on cloud-based FreePBX Hosting server.
Furthermore, the GUI can become even more robust and relevant, once integrated with third-party external solutions. The interface might come in handy when working with call routing, auto-dialers, or predictive dialing systems. Some solutions allow businesses to easily create a campaign and workflows, manage call queues, agent reports, and more all from one centralized and easy-to-use dashboard
Setting up the Environment
Before installing FreePBX, it’s important to prepare your environment to ensure a smooth installation and reliable operation. You can deploy the FreePBX software on either a virtual machine or physical hardware, depending on your organization’s needs and available resources. The recommended minimum system requirements are a single-core processor, 2 GB of RAM, and at least 20 GB of storage space.
A crucial step in setting up your FreePBX system is configuring the network. Assigning a static IP address to your FreePBX server ensures consistent connectivity and makes it easier to access the FreePBX dashboard from other devices on the same network. This is especially important for a phone system that needs to be reliably available to users at all times.
You’ll also need to install the Apache web server, which serves the FreePBX graphical user interface. During the setup process, make sure to set a strong root password to secure your system against unauthorized access. Properly configuring these elements lays the foundation for a stable and secure FreePBX installation, whether you’re running it on a dedicated server or a virtual machine.
How to Install FreePBX on Linux?
The installation process involves the following steps. Before starting, ensure that all prerequisites and dependencies are met, including that php is installed and properly configured.
Without further ado, let us go through our step-by-step guide on how to install FreePBX using the Linux operating system.
We will focus on the installation script for the FreePBX interface:
- To execute the script, ssh to the Debian 12 OS as the ‘root’ user, and then run the following commands:
cd /tmp

wget https://github.com/FreePBX/sng_freepbx_debian_install/raw/master/sng_freepbx_debian_install.sh  -O

 /tmp/sng*freepbx_debian*install.sh

bash /tmp/sng*freepbx_debian*install.sh
These script steps will install the necessary components for FreePBX.
- Wait around 30 minutes or more for the script to complete. You can run it in the background while monitoring the process through the logs, which are available at “/var/log/pbx/freepbx17-install-< date-timestamp>.log”
- Use the installation script to install the FreePBX-related software packages on top of the standard Debian operating system.
- Set up the Sangoma Debian online location to get the Sangoma software packages required for the commercial modules of the FreePBX.
To check your network configuration, use the following command:
ifconfig
Arguments Accepted by the Installation Script
Note the double ‘–‘ before any argument accepted by the installation script:
- –dahdi: This argument can be used when setting up FreePBX with DAHDI, which is needed for Sangoma cards. It is suggested for users to utilize FreePBX with Sangoma digital or analog cards. It will also download the wanpipe and DAHDI drivers you need.
- –testing: This can be used whenever you want to test the “development” or “testing” repositories. New or updated packages can be put in the “development/testing” area first so that you make sure they will not cause problems before they are moved to the “production” area.
- –nofreepbx: You can use this argument in case you do not wish to set up the Freepbx package since it allows you to simply create the initial setup for Freepbx.
- –noasterisk: This is helpful if you don’t want to set up the Asterisk package and prefer to use your own Asterisk.
- –dahdi-only: Using this argument will let you add DAHDI to a system that has already been set up without it.
- –skipversion: This one is useful for checking if the install script version currently available on GitHub is newer than the one you already have. If the latest version was updated, the script will not be able to run. This GitHub version check is highly recommendable for smooth interface use.
- –opensourceonly: When you use this argument, it will allow the script to install only the open-source parts of Freepbx.
How to Access the FreePBX Interface?
The address of the web interface is the same as that of the computer with FreePBX installed. To check it out, run the ifconfig command in the console of the computer where the web interface is installed. You will see the settings of all the device’s network interfaces. Simply type the desired IP address in the browser and press enter.
After accessing the web interface, you will be prompted to create the initial admin account. Click on ‘Create Account’ and set up your admin username and password. This admin account will have full privileges to manage the FreePBX system.
Once the admin account is created, use your admin username to log in to the FreePBX admin dashboard. From the FreePBX admin interface, you can manage user accounts, configure modules, and adjust system settings.
FreePBX Module Management: Overview of Available Modules
Moving on, let us explore how you can manage FreePBX modules. This means that the system provides the ability to install new modules, update and remove existing ones, as well as disable working modules. After you install, update, or remove modules, you must click the ‘Apply Config’ button to apply the new config and ensure your changes take effect. There are 4 separate module sources available:
- Basic: The very basis of the system where the biggest concern is how to update and maintain developers.
- Extended: Modules from this source have a lower priority than the basic ones.
- Unsupported: FreePBX developers are not responsible for these modules’ performance, as they are solely created by independent programmers.
- Commercial: Relating to commercial modules or support elements.
Furthermore, GUI users can also choose from licensed add-ons bundles, available on the official FreePBX website. The website also allows you to browse module listings based on 70+ categories, such as Administration, Call Center Bundle, Voicemail, Reporting, and many others.
How to Configure FreePBX?
For a detailed look at all the modules, you need to read the official guidelines for working with the system. You can download it from the official Asterisk website.
Below is a simple step-by-step guide on how to set up FreePBX from scratch, allowing you to use the basic options and get started:
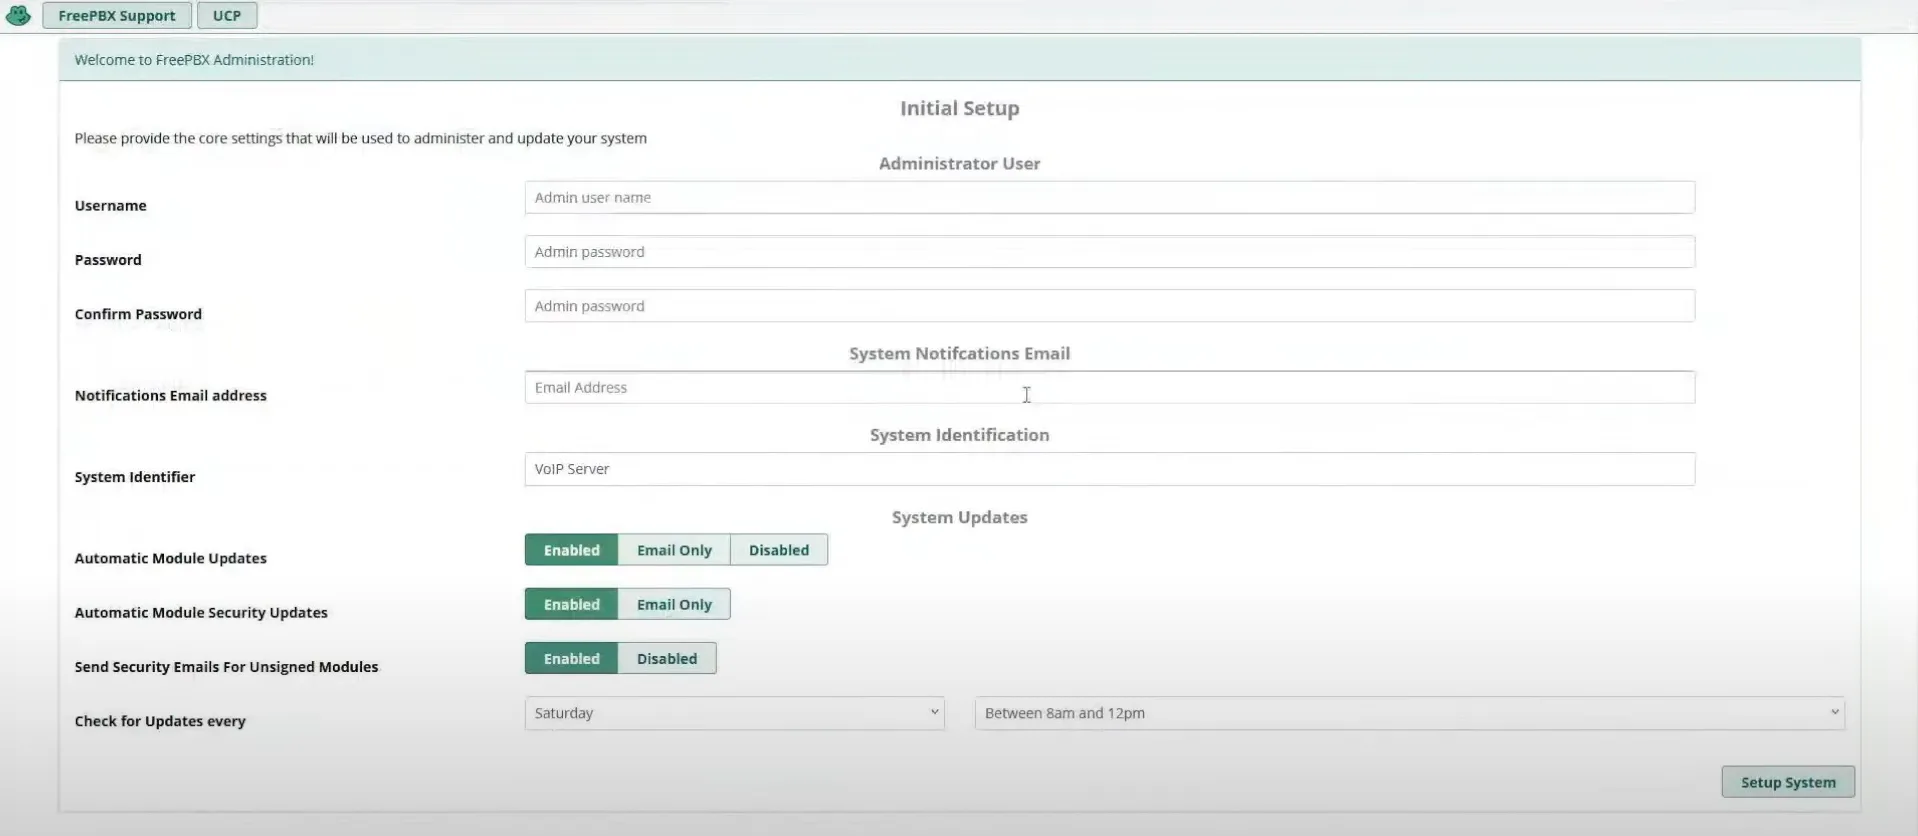
- Start by providing core settings in the Initial Setup menu, which should look like this. Make sure to set the correct time zone for your system to ensure accurate call logs and scheduling.

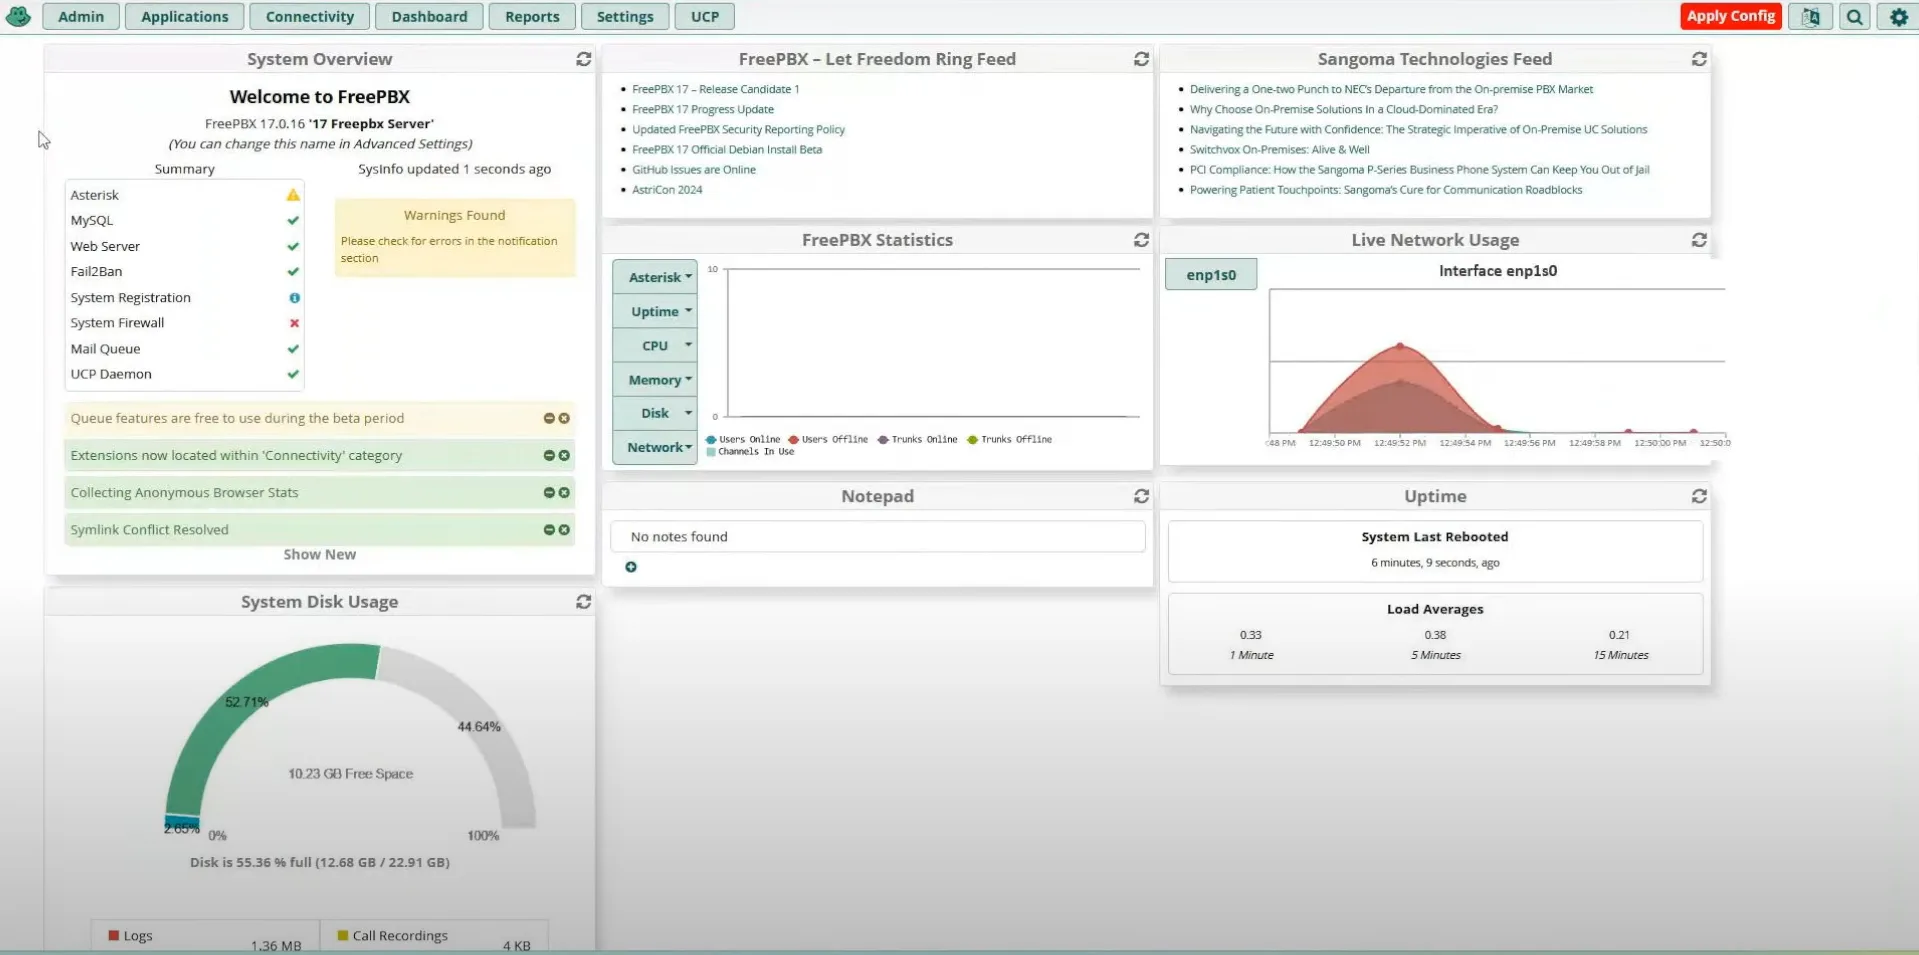
- Once you finish your setup, you should see data similar to what is shown in the screenshot below.

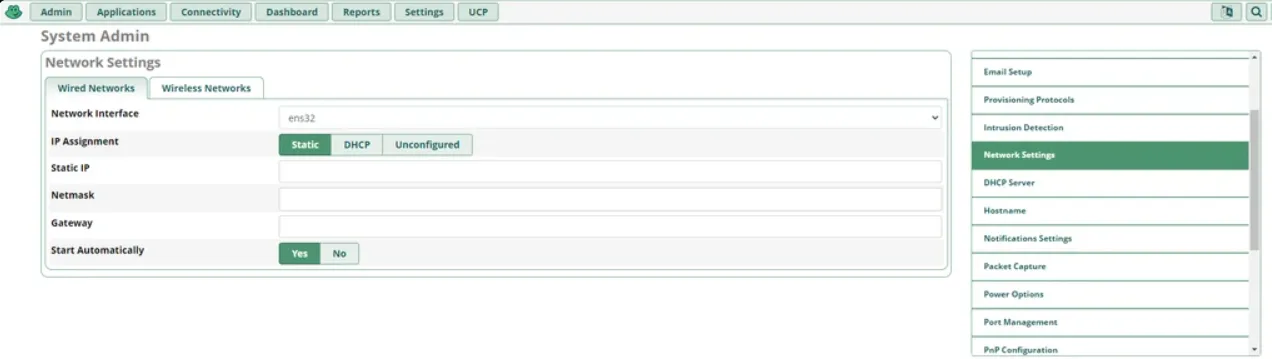
- You can now continue your configuration, e.g. by going to the Admin menu, and then opening the System Admin tab and activating FreePBX. Activation is required to access paid modules and support.
- Configure your network settings, choosing the right Network Interface, IP Assignment (Static, DHCP, or Unconfigured), IP, Netmask, Gateway, and Start Automatically (Yes/No).

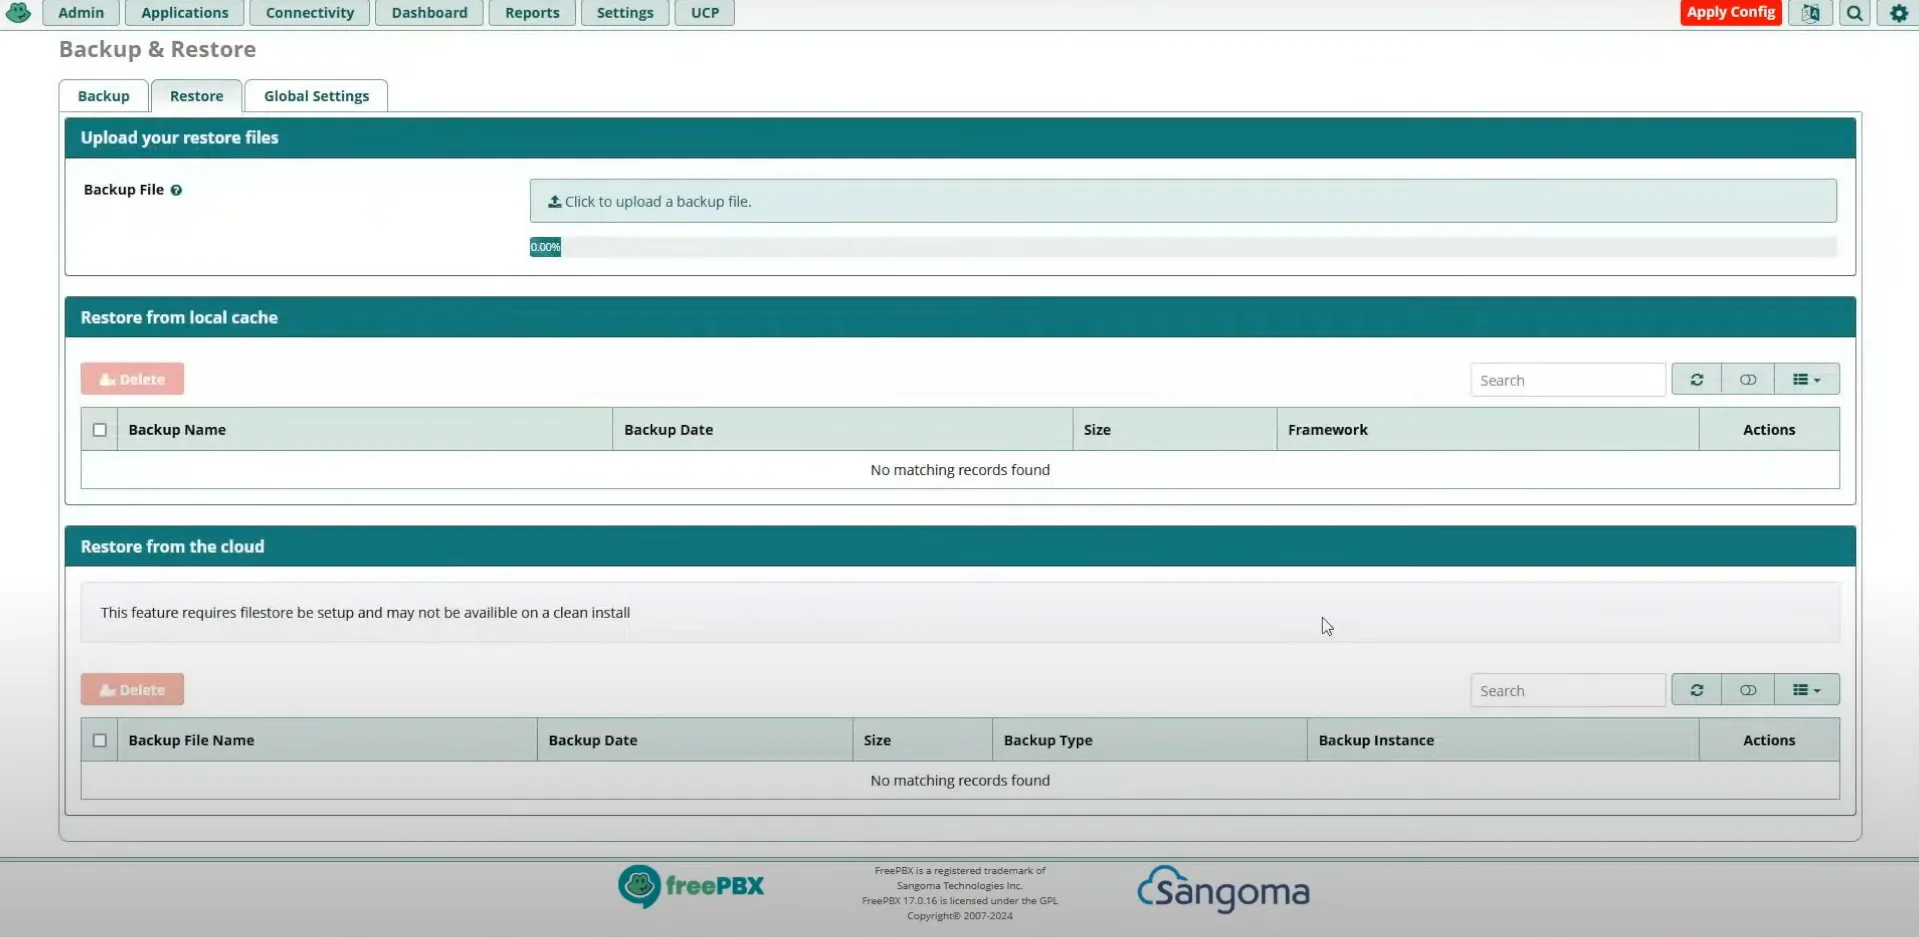
- Go to the Backup and Restore tab from the Admin menu to set up your backup configuration. These tools also allow you to restore from a backup file or save your configuration as a backup file in a specific directory. This option should look like in the image below:

Continue setting up your interface. When configuring options, you can enable features such as video calls, set up the system to receive calls by configuring inbound routing, and manage extensions. After making major configuration changes, it is recommended to perform a system reboot to ensure all changes are properly applied. To find the exact step-by-step guides and assistance related to specific options, you can rely on the Sangoma Documentation, which acts as the official FreePBX Wiki.
Troubleshooting and Testing the Installation
Once you’ve completed the FreePBX installation process, it’s essential to verify that everything is working as expected. Start by accessing the FreePBX login page from a web browser using the static IP address you assigned to your FreePBX server. If the FreePBX dashboard loads successfully, you know the Apache web server is running and the system is reachable on your local network.
If you encounter issues accessing the web interface, double-check that the Apache service is active and that your firewall settings allow traffic on the necessary ports. Also, ensure that the root password and admin user details were set correctly during installation, as these are required for FreePBX login.
To further test your setup, try creating a new extension and registering a softphone or IP phone to your FreePBX system. Place a test call to confirm that the asterisk server is handling calls as expected. If you run into permission errors or configuration issues, review the installation logs and verify that the Apache user has the specific permissions needed to access FreePBX files.
By following these troubleshooting steps and testing basic functionality, you can be confident that you have successfully installed FreePBX and that your phone system is ready for further configuration and use.
Key Advantages of Using FreePBX on Linux
FreePBX users can take advantage of numerous benefits when opting for this software. One key advantage is that FreePBX supports interactive voice response (IVR) systems, allowing businesses to automate customer interactions and customize call routing based on caller input. We will go through some of the key pros for both local use and cloud-based use.
Cloud-Based FreePBX Benefits
- Cost Efficiency: There is no need to buy any additional hardware, as the interface can be run entirely on cloud servers.
- Technical Support: If you need any help in adapting the appropriate modules and solutions, you can always rely on specialized technicians’ aid online.
- Seamless Software Adoption: No need to have pro technical knowledge since cloud-based systems often offer ready solutions for an easier installation and setup.
- Improved Agent Mobility: Setting up a virtual PBX enhances employee flexibility and it also allows the system to redirect calls to mobile numbers within the organization.
- Relevant Voicemail Routes: Cloud-based VoIP systems improve the way calls are redirected to voicemail when a particular user is busy or during off-hours.
Local FreePBX Benefits
- Direct Team Supervision: Local solutions give managers more independence in terms supervising and controlling agents and their productivity.
- Boundless Flexibility: FreePBX is useful in both small companies as a cost-effective solution and in large call centers, where its functions are exceptionally required.
- Additional Cost Savings: Switching to VoIP services enhanced by the FreePBX solutions, businesses can save more money in comparison to land-based phone lines.
Explore FreePBX Now: A Final Word
FreePBX can be considered a strong and adaptable VoIP PBX system, which will transform the way your company deals with operations related to call centers and customer support. What makes this interface so unique is how it provides businesses with a more cost-efficient option than the old-fashioned land-based telephony. Moreover, FreePBX installation on Linux is simple, and the software offers a wide range of extra features.