


In the dynamic world of online content, ensuring that your readers have access to the latest information is crucial. WordPress, the popular content management system, offers a range of features to help maintain and update your website efficiently.
One such feature is displaying the last updated date on your posts and pages, which serves both as a transparency measure for your audience and as a means to improve SEO.
In this guide on how to show last updated date on WordPress posts and pages, we’ll look at the significance of showing the last updated date, its importance for both beginners and experts, and a step-by-step process to implement it on your WordPress site.
Significance of Showing Last Updated Date:
For website visitors, knowing when a piece of content was last updated instills trust and credibility. It signals that the information provided is current and relevant, which is particularly important for topics prone to changes or updates.
This transparency fosters a sense of reliability, encouraging users to revisit your site for updated information.
From an SEO perspective, displaying the last updated date can positively impact search engine rankings. Search algorithms prioritize fresh and updated content, as it’s perceived to be more valuable to users.
By showcasing the last updated date, you’re signaling to search engines that your content is regularly maintained, potentially leading to higher visibility in search results.
Importance for Beginners and Experts:
For Beginners:
1. Transparency:
Understanding how to display the last updated date empowers beginners to build trust with their audience by providing accurate information.
2. SEO Boost:
Even for those new to WordPress, implementing this feature can contribute to improved search engine rankings, aiding in the visibility of their website.
For Experts:
1. User Experience Optimization:
Experts can leverage the last updated date feature to enhance the user experience, ensuring that visitors have access to the most recent information.
2. Advanced Customization:
Experienced WordPress users can further customize the display of last updated dates to align with their website’s design and branding, showcasing their proficiency in web development.
Step-by-Step Process:
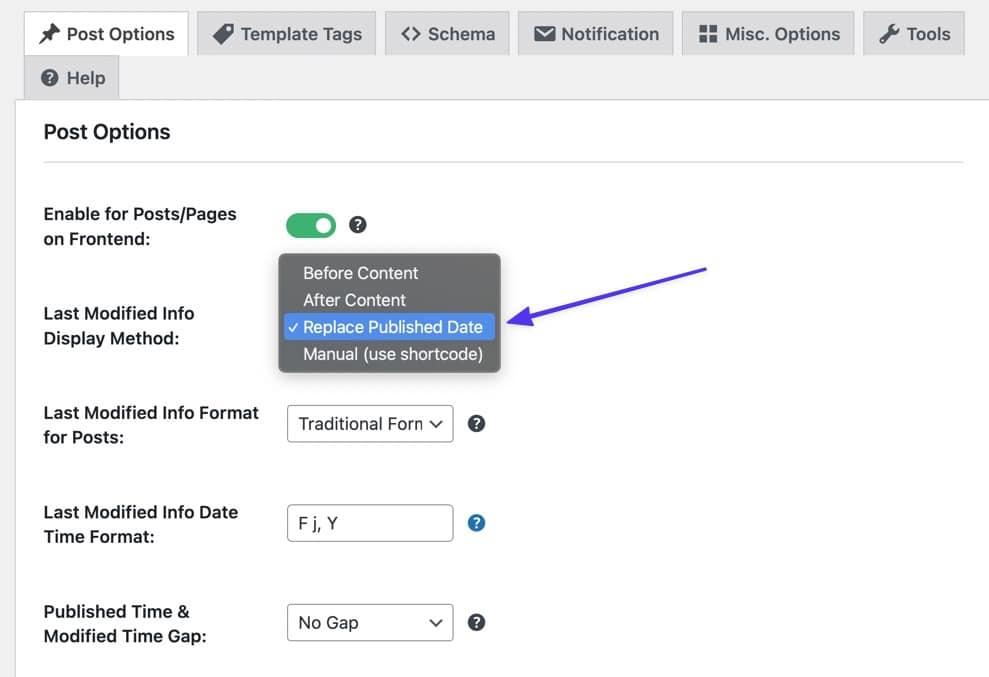
1. Using a Plugin:
For beginners, the simplest way to display the last updated date is by using a plugin. Follow these steps:
Step 1: Login to your WordPress dashboard.
Step 2: Navigate to “Plugins” > “Add New.”
Step 3: Search for a plugin such as “WP Last Modified Info.”
Step 4: Install and activate the plugin.
Step 5: Once activated, the last updated date will automatically be added to your posts and pages.
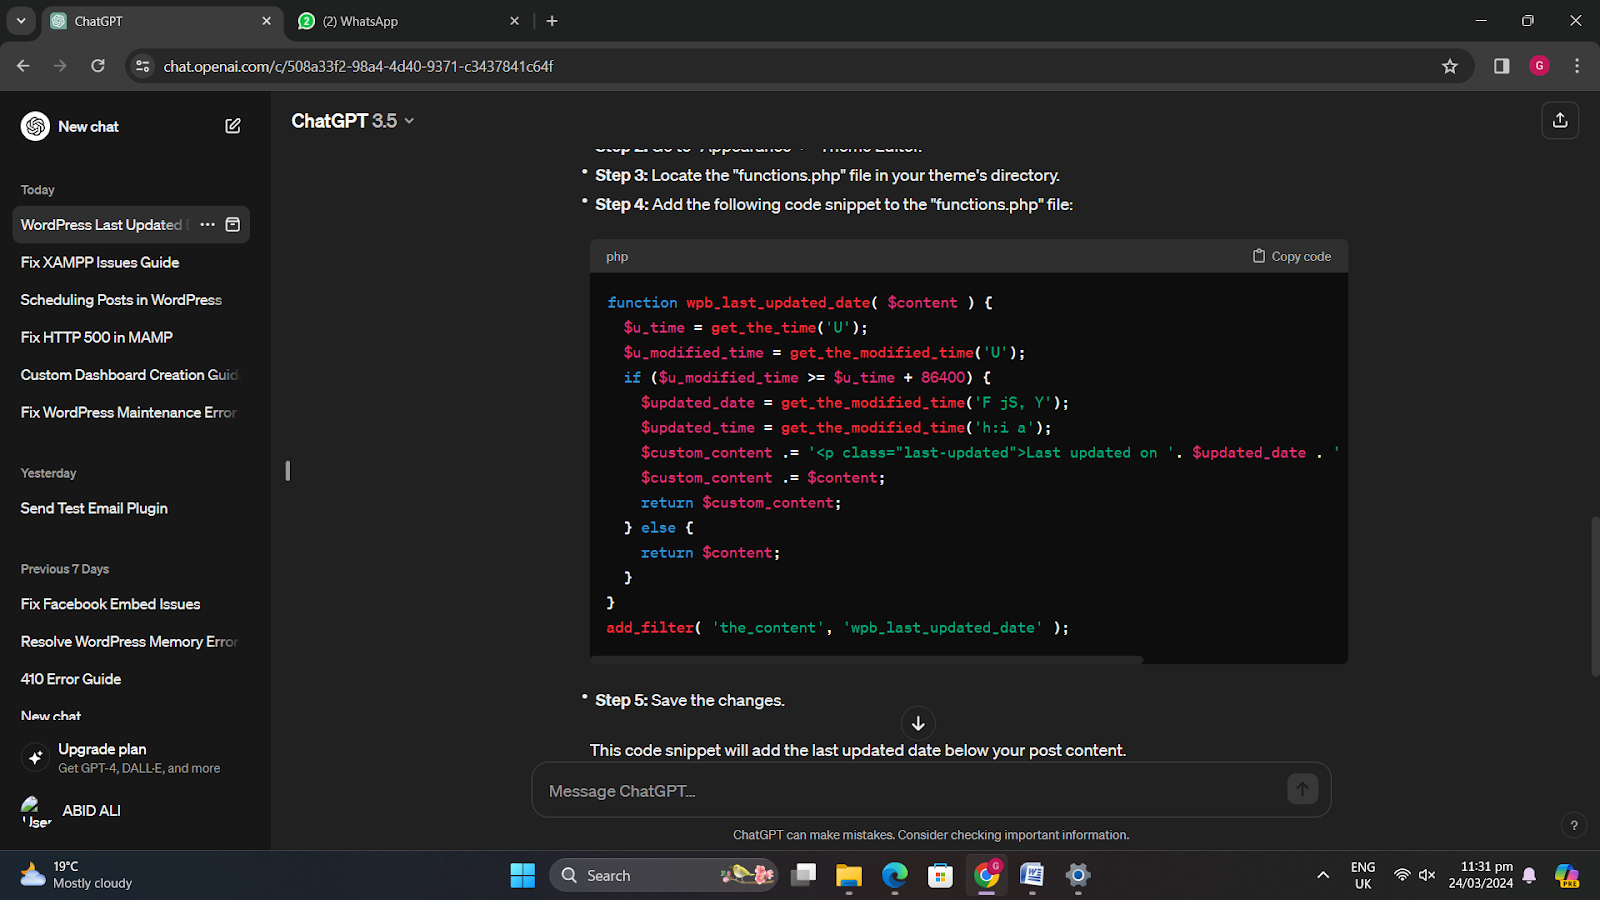
2. Manually Adding Code:
For those comfortable with coding or seeking more control, manually adding code is an option. Here’s how:
Step 1: Access your WordPress dashboard.
Step 2: Go to “Appearance” > “Theme Editor.”
Step 3: Locate the “functions.php” file in your theme’s directory.
Step 4: Add the following code snippet to the “functions.php” file:
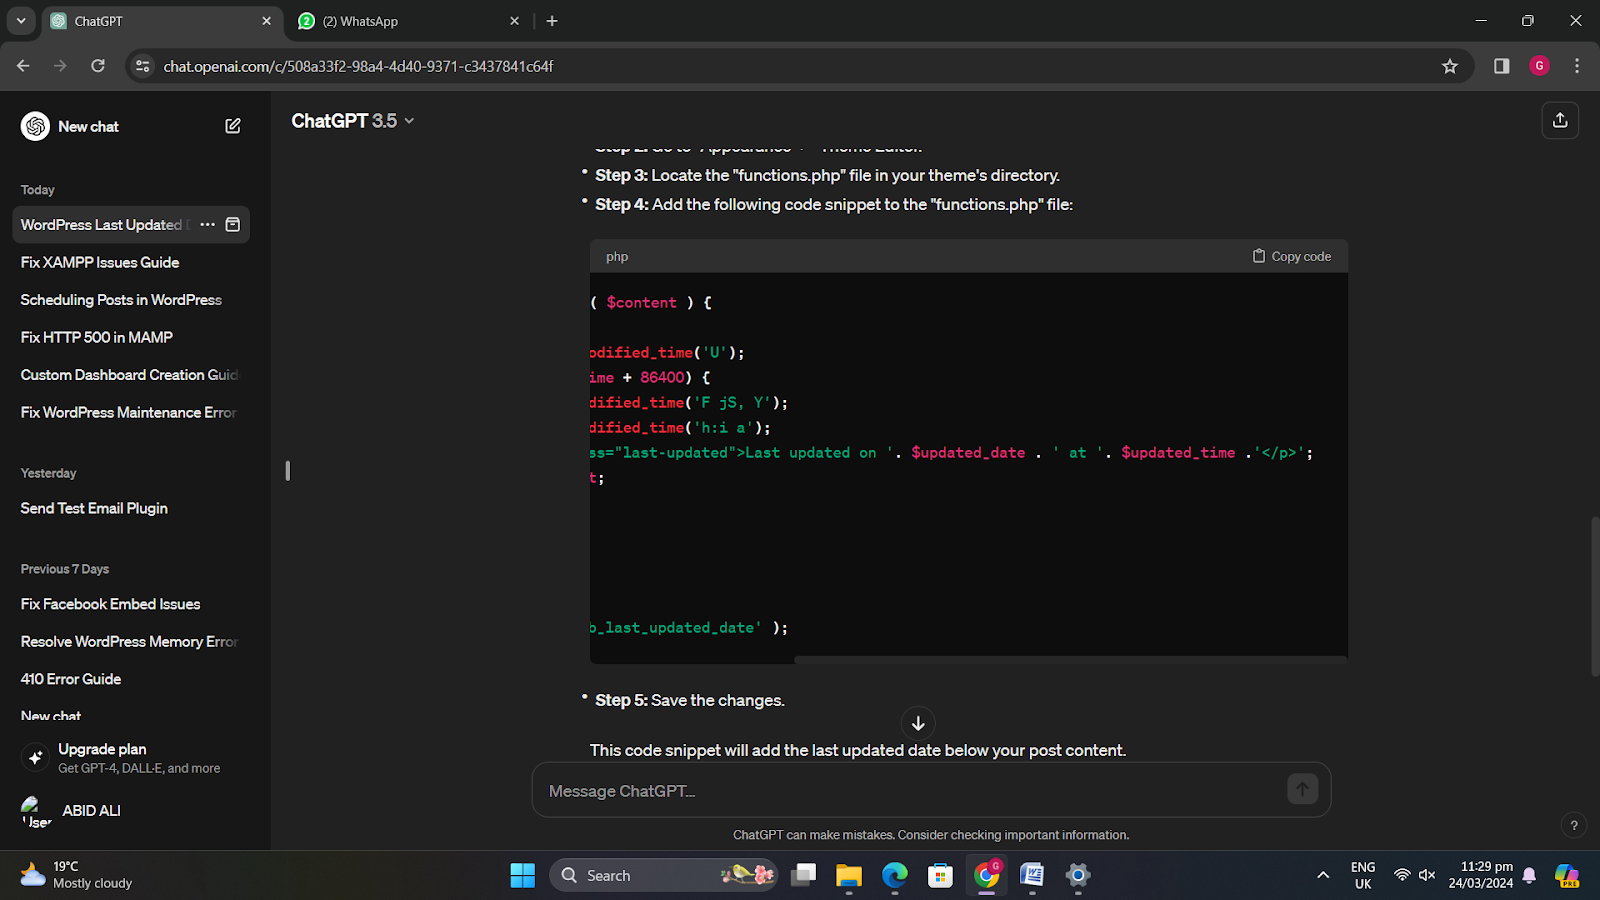
Step 5: Save the changes.
This code snippet will add the last updated date below your post content.
Conclusion:
Displaying the last updated date on WordPress posts and pages is a simple yet impactful practice that enhances transparency, credibility, and SEO.
Whether you’re a beginner or an expert, implementing this feature is within reach, thanks to WordPress’s user-friendly interface and customization options.
By following the steps outlined in this guide on how to show last updated date on WordPress posts and pages, you can effectively communicate the freshness of your content to your audience while also improving your website’s search engine visibility.
Start showcasing the latest updates on your WordPress site today and reap the benefits of a more informed and engaged audience.


Leave a Reply