Securing access to sensitive content on your website is a fundamental necessity in today’s digital world.
Whether you’re managing client portals, offering premium content, or simply protecting confidential resources, ensuring that only authorized users can access specific web pages is crucial.
One of the easiest and most effective ways to do this is by password protecting a URL. In this guide, we’ll focus on two widely used methods for password protecting a URL: using .htaccess (on Apache servers) and using the built-in features of popular CMS platforms like WordPress.
By the end of this article, you’ll have a clear understanding of how to password protect a URL using these methods, when and why you should use them, and what best practices to follow.
Why Password Protect a URL?
Before we jump into the technical steps, it’s essential to understand why password protecting a URL can be beneficial. Some common reasons include:
- Security of Sensitive Data: Websites that handle confidential information, such as client portals, internal reports, or personal data, need to restrict access to authorized users only.
- Restricting Access to Premium Content: If you offer paid or subscription-based services, password protection ensures that only your paying customers can access exclusive content.
- Complying with Legal Requirements: Many businesses, especially those in sectors like healthcare, finance, or education, must comply with regulations that require the protection of sensitive data.
- Simple and Effective Control: Adding password protection to a URL is one of the simplest ways to control access to specific pages without needing to build complex user management systems.
With that understanding, let’s dive into the first two methods for how to password protect a URL.
How to Password Protect a URL Using .htaccess and .htpasswd
If your website is hosted on an Apache server, one of the most effective and secure ways to password protect a URL is through the use of .htaccess and .htpasswd files. This method works by configuring the server to prompt for a username and password before allowing access to a particular URL or directory.
Step-by-Step Guide for .htaccess Password Protection
Here’s a step-by-step process to password protect a URL using .htaccess:
Step 1: Create or Edit Your .htaccess File
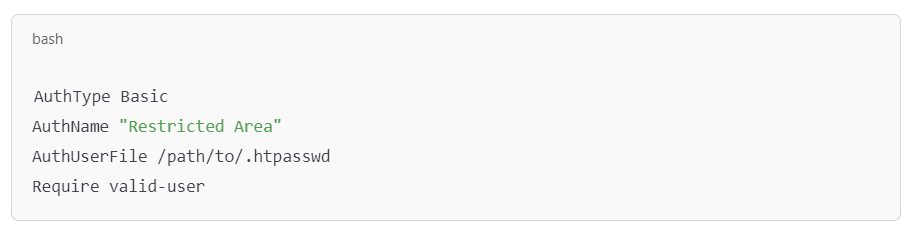
The .htaccess file is a server configuration file that controls access to specific directories on your website. If your website already has an .htaccess file in the directory you want to protect, you can edit it. Otherwise, create a new one in the directory you wish to secure.
Add the following lines of code to your .htaccess file:
Step 2: Create the .htpasswd File
The .htpasswd file stores usernames and hashed passwords. You can create this file manually or use command-line tools or online generators to help you generate the required encrypted password.
If you have access to a terminal, you can use the following command to create the .htpasswd file:

Replace username with the username you want to grant access.
You will then be prompted to enter a password. The tool will automatically encrypt the password and store it in the .htpasswd file.
If you want to add additional users, you can use the following command:

Step 3: Upload the Files to Your Server
Once your .htaccess and .htpasswd files are configured, you need to upload them to your server. Place the .htaccess file in the directory you want to protect and ensure that the .htpasswd file is located in a secure directory (outside your web root if possible).
Step 4: Test the Password Protection
After setting up the files, visit the URL that you’ve password protected. You should see a prompt asking for a username and password before you can access the page. Enter the credentials you created in the .htpasswd file to gain access.
Advantages of .htaccess Protection:
Simple and Secure: This method is highly secure as the passwords are stored in an encrypted format in the .htpasswd file.
Doesn’t Require Website Changes: You don’t need to modify your website’s code or content to implement this type of protection.
Server-Level Protection: The protection happens at the server level, which means it can block unauthorized access before the page even loads.
Disadvantages:
Limited to Apache Servers: This method only works on servers running Apache. If you’re using a different web server, such as Nginx, you’ll need to look for an alternative solution.
Requires Server Access: You’ll need access to the server’s file system, which may not be available on all hosting plans, especially shared hosting.
Password Protecting a URL Using WordPress
If you’re running your website on WordPress, the process of password protecting a URL is even easier. WordPress provides built-in functionality for password protecting individual posts or pages, and for more advanced needs, plugins can offer even greater flexibility.
Method 1: Using WordPress’s Built-In Password Protection
WordPress has a simple, built-in method for password protecting individual posts and pages. This method doesn’t require any coding or technical skills.
Step-by-Step Guide:
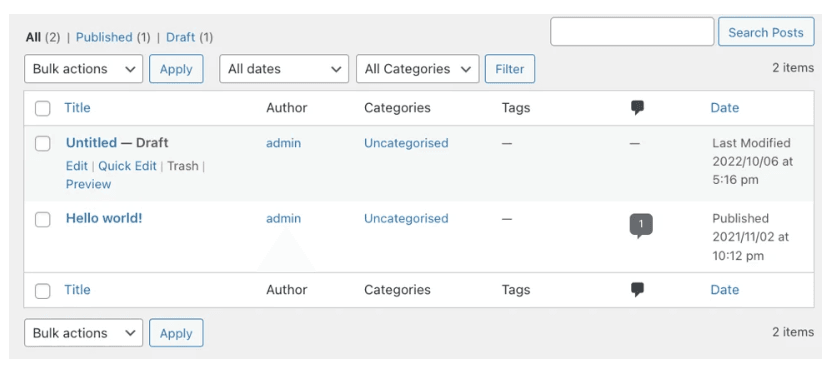
- Edit the Page or Post You Want to Protect: Go to the WordPress dashboard and navigate to the page or post you wish to protect.
- Change the Visibility Settings: In the right-hand sidebar of the editor, you’ll find a section labeled “Visibility” under the “Publish” settings.
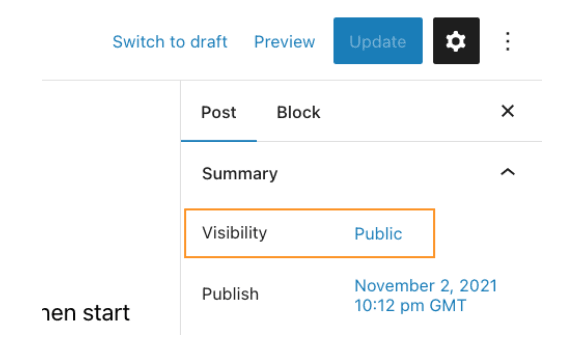
- Click the “Edit” link next to “Visibility” and select “Password Protected.”
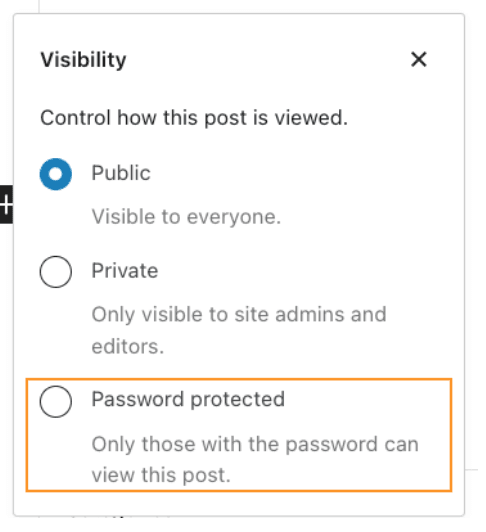
- Enter a Password: Once you’ve selected “Password Protected,” a field will appear allowing you to enter a password. This password will be required to access the page.
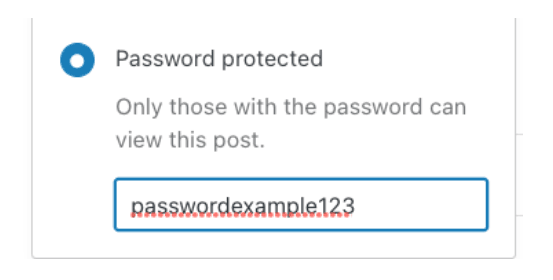
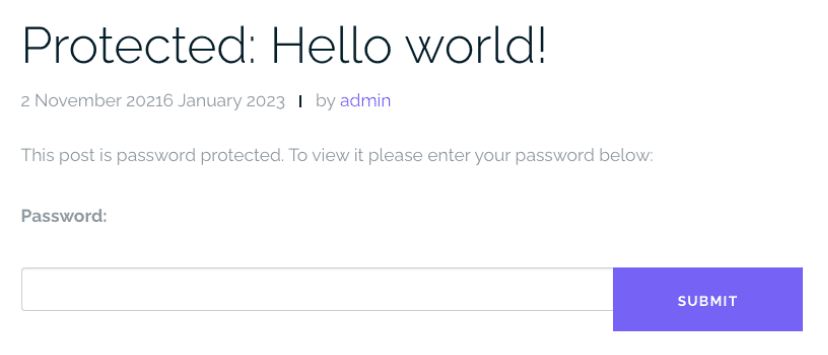
- Save or Publish the Page: After entering the password, click “Save Draft” or “Publish” to make the changes live. Visitors to that page will now need to enter the password to view the content.
Use Cases for Built-in Protection:
- Client-Only Pages: If you have pages that are intended only for clients or certain members, password protection is a simple way to limit access.
- Event or Special Access Pages: This method works great for creating exclusive access to special event pages, promotions, or previews that are only meant for a select group.
Method 2: Using WordPress Plugins for Advanced Protection
If you need more control over how you password protect a URL, there are several plugins available in the WordPress repository that offer enhanced features.
These plugins can offer more flexibility, such as restricting access to multiple URLs, setting expiration dates for password protection, or requiring users to log in with specific roles.
Some popular plugins for password protection include:
- Password Protect WordPress (PPWP): This plugin allows you to password protect individual pages, entire categories, or even your whole site. It also lets you create multiple passwords and manage access on a more granular level.
- Wordfence Security: While primarily a security plugin, Wordfence also allows for password protection of URLs, along with features such as two-factor authentication, firewall protection, and malware scanning.
How to Use a Plugin to Password Protect a URL:
- Install the Plugin: Navigate to the “Plugins” section in your WordPress dashboard, search for the plugin you want to use, and click “Install.” After installation, click “Activate.”
- Configure the Plugin: Once activated, follow the plugin’s instructions for configuring password protection. Each plugin will have its own setup process, but most allow you to easily password protect URLs with just a few clicks.
- Set Protection Rules: Depending on the plugin, you can set specific rules for password protection, such as requiring different passwords for different users or limiting access based on user roles.
Advantages of WordPress Password Protection:
- No Technical Knowledge Required: The built-in feature is extremely easy to use and doesn’t require any coding skills.
- Flexibility with Plugins: WordPress plugins give you a wide range of options for customizing your password protection, from restricting entire sections of your site to managing multiple users with unique access rules.
- Great for Content Creators: If you’re offering exclusive or premium content, password protecting individual posts or pages is a great way to manage access.
Disadvantages:
- Not as Secure as Server-Side Solutions: While password protection in WordPress is convenient, it’s not as secure as using server-side methods like .htaccess. A determined attacker could potentially bypass WordPress’s password protection if the rest of your site isn’t well-secured.
- Limited Customization with Built-In Method: The built-in password protection feature is relatively basic. For more advanced needs, such as protecting multiple URLs or creating detailed user access levels, you’ll need a plugin.
Best Practices for Password Protecting a URL
Regardless of which method you choose, there are a few best practices to keep in mind when password protecting a URL:
Use Strong Passwords: Ensure that your passwords are complex and difficult to guess. Use a combination of uppercase and lowercase letters, numbers, and special characters.
Change Passwords Regularly: For highly sensitive content, consider changing your passwords regularly to minimize the risk of unauthorized access.
Limit the Number of Users with Access: Only give passwords to users who absolutely need access to the protected content. For larger organizations, consider implementing role-based access control (RBAC) to manage user permissions.
Enable HTTPS (SSL Encryption): Always ensure that your site is using HTTPS to encrypt data transmitted between the user and your server. This prevents attackers from intercepting login credentials or other sensitive information.
Monitor Access: If you’re using a plugin, look for one that offers logging features so you can track who is accessing your password-protected URLs. This can help identify any potential security breaches or unauthorized access.
Final Thoughts
Password protecting a URL is an essential tool for managing access to sensitive content, whether it’s a client portal, premium content, or private documents. By using methods like .htaccess and WordPress’s built-in password protection features, you can easily secure your website and ensure that only authorized users can access certain URLs.
If you’re running an Apache server, .htaccess provides a highly secure, server-level solution. On the other hand, WordPress offers easy, user-friendly password protection for specific posts and pages, making it perfect for content creators who need a quick way to limit access.
Whichever method you choose, following best practices like using strong passwords, monitoring access, and regularly updating credentials will help you maintain a secure and professional web presence.