


Experiencing issues accessing your website? Seeing error messages like “This site can’t be reached” or “ERR_CONNECTION_REFUSED”? Website not loading at all?
Don’t panic – these errors are usually easy to fix with some troubleshooting. In this comprehensive guide, we’ll cover the most common causes of connectivity issues and walk through solutions to get your site back up and running.
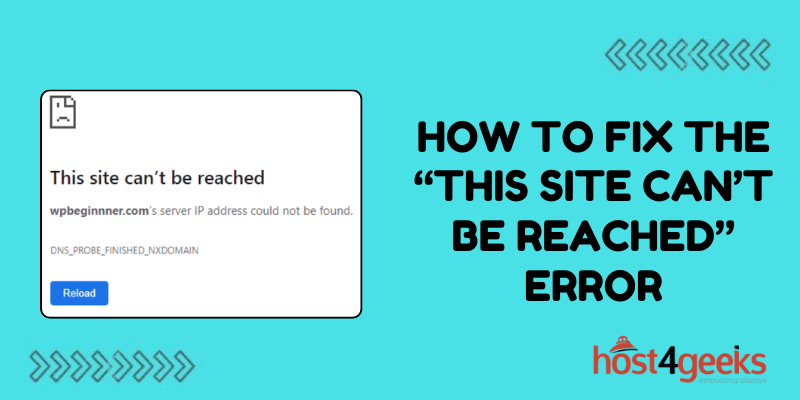
What Causes the “This Site Can’t Be Reached” Error?
There are a few common causes of the “this site can’t be reached” error and related website connection issues:
DNS Issues
One of the most common sources of this error is a DNS configuration issue. Your domain name system (DNS) transforms a web address into the correct IP address. If the DNS records are configured incorrectly or are outdated, users won’t be able to reach your site.
Clearing your browser cache and testing with another device can help determine if it’s a DNS issue impacting all users.
Server Outages or Connectivity Problems
If your web server experiences an outage or drops connectivity, your site will be unreachable until connectivity is restored. This could be caused by a power outage, hardware failure, or a network configuration issue.
Testing from various locations will help determine if server connectivity is the culprit. You may also be able to check server status pages from your web host.
Expired Domain Registration
If you fail to renew your domain registration, the domain expires and website visitors will get warnings that the site can’t be reached. This requires renewing your domain registration to get things working again.
Checking your domain registration status will confirm if this issue is impacting accessibility.
Web Hosting Service Disruptions
Problems at your web hosting provider can also prevent access to your site. Issues such as service outages, configuration errors, or excessive resource usage could block users.
You’ll need to work with your web host’s support team to identify and correct any problems on their infrastructure impacting your website.
Web Server Misconfigurations
Sometimes web server misconfigurations like incorrect DNS settings or failure to renew an SSL certificate can render a site inaccessible. Your web server software may require reconfiguration to get things working properly again.
Reviewing server logs and configuration files may reveal any problems after recent changes. You may need your web host’s assistance with server reconfigurations.
Malicious Attacks
In some cases, accessibility issues are caused by DDoS attacks or other malicious attempts to take down a website. If foul play is suspected, work with your hosting provider to implement firewall rules or other solutions.
Signs of attack include extremely slow load times rather than complete unavailability. Your host will be able to check traffic logs for patterns indicating an attack.
Resource Limitations
If your web server is overloaded, has insufficient RAM, or is hitting other resource limits, your website may become sluggish or unresponsive to visitors.
Upgrading to a larger hosting plan is the best long-term solution. In the short term, your provider may be able to migrate you to a less utilized server.
Carefully monitoring site resource usage can predict when an upgrade is needed. Slowdowns during sudden traffic spikes provide clues.
Site Caching Issues
A problem with your caching configuration could also lead to “site can’t be reached” or timeout errors for users. This can happen if the cache doesn’t invalidate properly or serves stale copies of pages.
Tweaking the caching settings or clearing the cache may be able to resolve any conflicts or glitches.
Site Redirects Misconfigured
If your site has recently changed domains, incorrect redirect settings could be blocking users from reaching the new site. Properly configured redirects are vital when migrating domains.
Reviewing your .htaccess settings and testing redirects will uncover any issues sending users to outdated domains rather than the current site.
Step-by-Step Diagnosis and Repair Process
Now that you know the possible sources of connectivity and unavailability problems, here is a step-by-step process for diagnosing and repairing the issue:
Confirm the Scope of the Problem
First, try accessing the site from the computer/device/network where you saw the initial error message. Is the problem still occurring, or was it temporary?
Also, attempt to access the site from other locations and devices to determine if it’s an isolated or widespread issue impacting all users.
Check Domain Registration Status
Log into your domain name registrar account and confirm your registration didn’t expire causing the domain to lapse. Renew it if needed and wait up to 24 hours for DNS changes to propagate.
Verify DNS Configuration is Correct
Use a DNS checking tool to validate that your DNS records are properly configured and pointing to the correct IP address hosting your site. Update any incorrect settings.
Try Clearing the DNS Cache
From the problematic device, clear the DNS cache to eliminate any outdated records that could be causing connectivity problems. Instructions vary by operating system.
Check Server Status Pages and Alerts
See if your web host provides server status pages or alerts to check for downtime. Contact them if they indicate a service disruption is occurring.
Review Server Logs for Issues
Your hosting provider should be able to access server logs to check for errors, resource limitations, misconfigurations, or attack indicators. Work with them to decipher log data.
Monitor Performance Metrics
Use a site monitoring tool to check real-time performance metrics. Spikes in response times or error rates can indicate problems. Resource use like RAM consumption can also hint at limits being hit.
Confirm Web Server Software is Running
Connect to the server via SSH or admin console and verify the web server software itself is actually running. Restart it if needed and troubleshoot why it failed.
Look for Signs of a DDoS Attack
Slowdowns rather than complete downtime may indicate a DDOS attack. Check traffic logs for suspicious sources and patterns. Work with your host to block malicious requests.
Review Caching Settings
If using a caching plugin, inspect settings to check for issues with cache clearing that could be serving outdated content. Tweak settings or clear the cache to test.
Check Site Redirects
Verify site redirect settings don’t incorrectly send users to outdated domains. Use redirect checker tools to uncover misconfigurations.
Upgrade Hosting Plan if Overloaded
If your web server is resource-constrained, upgrade to a larger hosting plan with more RAM, CPU cores, etc. Even temporary upgrades may help during traffic spikes.
Work with Your Web Host
Your hosting provider may need to troubleshoot server issues, review configurations, check infrastructure status, or make DNS tweaks. Open a support ticket if problems persist.
Preventing Future Connectivity Issues
Once you’ve resolved any immediate problems and restored website access, it’s a good idea to implement some solutions to help avoid headaches in the future:
- Use monitoring tools to get alerted about downtime and performance problems before users complain. This allows you to proactively address emerging issues.
- Automatically renew domain registrations so they never inadvertently expire. Many registrars offer this option.
- Implement a DNS failover service to immediately switch DNS to another server if yours goes down.
- Consider a secondary web host or content delivery network to provide redundancy if your primary server experiences problems.
- Regularly audit server settings to check for misconfigurations that could cause problems over time.
- Stay on top of resource usage and upgrade hosting plans proactively before hitting limits. Monitor usage trends.
- Use DDoS mitigation services provided by many web hosts to block attacks and stay online.
- Enable caching to ease server loads during traffic spikes, but test that it invalidates properly.
- Check error logs frequently so you identify and respond to problems faster.
With a mix of preventative measures and prompt troubleshooting when issues do arise, you can minimize website errors and keep your site accessible for visitors. Consistently fast performance and reliability will increase conversions and satisfaction.
Conclusion
Dealing with connectivity errors like the “this site can’t be reached” warning can be frustrating, but is usually fixable with a systematic approach.
Start by confirming the scope and drilling into potential causes like DNS problems, expired domains, server outages, hosting issues, misconfigurations, and attacks. Use troubleshooting tools and your hosting provider’s help to get to the bottom of the problem.
Implement monitoring and redundancy solutions to reduce headaches going forward. Your persistence in finding the source of the issue and getting it resolved will pay off with higher uptime and availability going forward.


Leave a Reply