WordPress, with its user-friendly interface and extensive customization options, empowers millions of websites worldwide. One of the key elements users often seek to personalize is the footer section.
The footer of a website may seem inconspicuous, but it holds significance in providing crucial information, enhancing user experience, and maintaining brand identity.
In this guide on how to edit the footer in WordPress, we will delve into the importance of editing the footer in WordPress, providing step-by-step instructions for both beginners and experts.
Significance of Editing the Footer in WordPress:
The footer of a website serves multiple purposes, making it a vital component of web design:
1. Brand Representation:
The footer often contains branding elements such as logos, taglines, or brand colors, reinforcing the website’s identity and creating a lasting impression on visitors.
2. Navigation Aid:
It typically houses links to important pages like contact information, privacy policy, terms of service, and sitemap, aiding users in navigation and improving website accessibility.
3. SEO Benefits:
Customizing the footer allows you to include relevant keywords, internal links, and schema markup, contributing to improved search engine optimization (SEO) and better visibility in search results.
4.Legal Compliance:
Websites often include legal disclaimers, copyright notices, and compliance statements in the footer to adhere to regulations and protect intellectual property rights.
5. Enhanced User Experience:
By adding helpful information or widgets like social media links, newsletter subscriptions, or recent posts, you can enrich the user experience and encourage further engagement.
Step-by-Step Guide to Editing the Footer in WordPress:
Whether you’re a beginner or an experienced user, customizing the footer in WordPress is a straightforward process:
For Beginners:
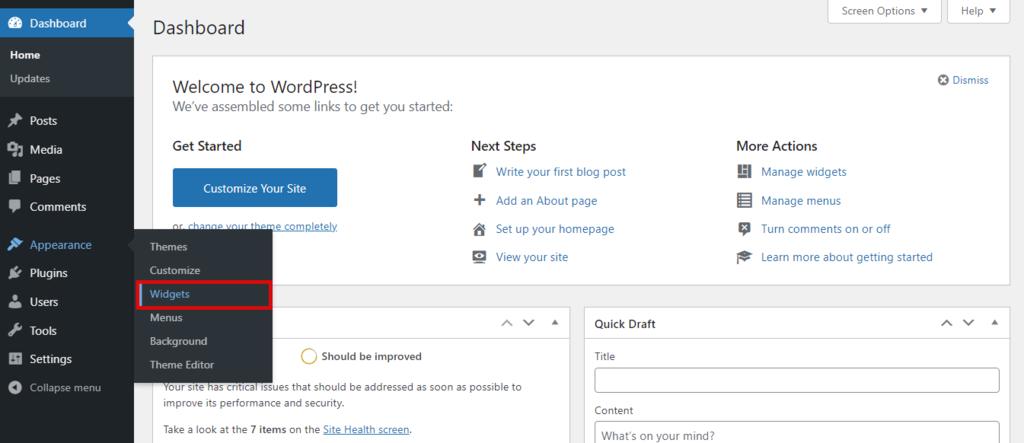
1. Access the WordPress Dashboard:
Log in to your WordPress admin panel by entering your credentials.
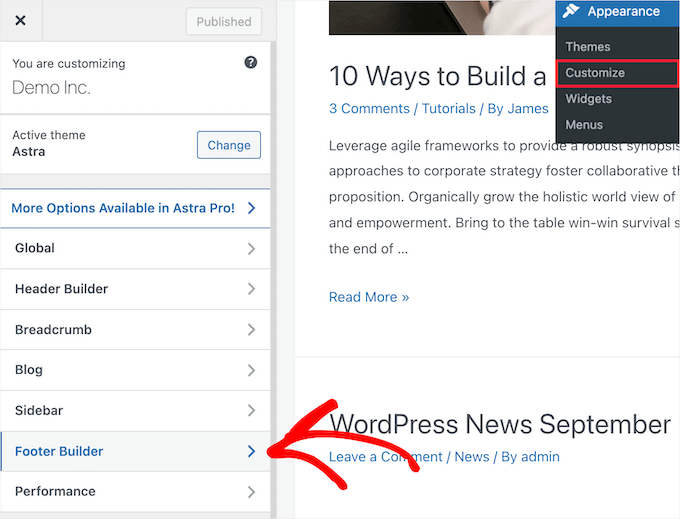
2. Navigate to the Theme Customizer:
Go to “Appearance” and select “Customize.” This will open the theme customizer interface.
3. Locate the Footer Section:
Depending on your theme, the footer customization options may vary. Look for a tab or section labeled “Footer” or “Footer Settings.”
4. Edit Text and Links:
Within the footer settings, you can typically edit text fields or add custom links. Update the text to reflect your desired content, such as copyright information or contact details.
5. Add Widgets:
Many themes support footer widget areas where you can drag and drop widgets for additional functionality. Explore available widgets like recent posts, social media icons, or a newsletter signup form, and place them in the footer widget area.
6. Save Changes:
Once you’re satisfied with your edits, click on the “Publish” or “Save Changes” button to make your modifications live on the website.
For Experts:
1. Access the Theme Files:
For advanced customization, you can directly edit the theme files. Access your WordPress installation via FTP or file manager provided by your hosting provider.
2. Navigate to Footer Template:
Locate the footer.php file within your theme directory. This file controls the structure and content of the footer section.
3. Make Edits:
Open the footer.php file using a text editor or a code editor. You can modify HTML, CSS, or PHP code to tailor the footer according to your requirements.
Add or remove elements, adjust styling, or incorporate dynamic content using WordPress functions.
4. Implement Child Theme (Optional):
To ensure your changes are not overwritten during theme updates, it’s recommended to create a child theme and place your customized footer.php file within it.
5. Test Changes:
After saving your modifications, visit your website to ensure that the footer appears as intended and that all functionalities are working correctly.
6. Backup Regularly:
As a precautionary measure, regularly back up your website files and database to prevent data loss in case of any unexpected issues.
Pros and Cons of Editing the Footer in WordPress:
Pros:
1. Customization:
Editing the footer allows you to tailor the website’s appearance and content to align with your brand identity and objectives.
2. Enhanced Functionality:
By adding widgets or custom code, you can enhance the footer’s functionality, providing users with valuable resources and improving user experience.
3. SEO Optimization:
Including relevant keywords and internal links in the footer can contribute to better SEO performance and improved search engine rankings.
4. Compliance:
Adding legal disclaimers and compliance statements ensures that your website adheres to regulations, reducing the risk of legal issues.
Cons:
1. Theme Limitations:
Some themes may have limited customization options for the footer, restricting your ability to make extensive changes without delving into code.
2. Risk of Errors:
Modifying theme files directly carries the risk of introducing errors or conflicts, especially if you’re not proficient in coding.
3. Maintenance Overhead:
Customized footers may require ongoing maintenance to ensure compatibility with theme updates and WordPress core updates.
4. Backup Dependency:
Failure to regularly backup your website files can result in data loss if unforeseen issues arise during customization.
Conclusion:
In conclusion, editing the footer in WordPress offers numerous benefits in terms of branding, usability, SEO, and compliance.
Whether you’re a beginner exploring the theme customizer or an expert delving into theme files, this guide on how to edit the footer in WordPress, equips you with the knowledge and steps needed to customize the footer to meet your website’s specific requirements.
By understanding the significance of the footer and mastering the editing process, you can elevate your website’s aesthetics and functionality while delivering an enhanced user experience to visitors.
