
Redirect rules are a vital component of managing a WordPress site efficiently. They serve various purposes, from improving user experience to enhancing SEO performance.
Whether you’re a beginner or an expert WordPress user, understanding how to add redirect rules to your wordpress site can significantly benefit your site’s functionality and performance.
Significance of Adding Redirect Rules to Your WordPress Site:
Redirect rules play a crucial role in directing traffic from one URL to another. They help maintain the integrity of your site’s structure, ensure a seamless user experience, and preserve SEO equity.
Here’s why they are significant:
1. Enhanced User Experience:
Redirect rules ensure that visitors reach the intended content, even if they mistype a URL or access outdated links. This prevents frustration and keeps users engaged with your site.
2. Improved SEO Performance:
Proper redirection helps search engines understand your site’s structure and prevents the dilution of SEO value caused by broken or irrelevant links. It also preserves backlink equity by redirecting old URLs to new ones.
3. Site Restructuring and Maintenance:
During site restructuring or updates, redirect rules enable you to seamlessly transition URLs without losing traffic or harming SEO rankings.
4. Prevention of 404 Errors:
By redirecting obsolete URLs to relevant pages, you can reduce the occurrence of 404 errors, which can negatively impact user experience and SEO.
For Beginners:
If you’re new to WordPress, adding redirect rules might seem daunting. However, with the right guidance, you can easily implement them. Here’s a step-by-step guide:
Step 1: Choose a Redirect Method:
WordPress offers several redirect methods, including 301 (permanent), 302 (temporary), and 307 (temporary). For most cases, a 301 redirect is suitable as it indicates a permanent move.
Step 2: Install a Redirect Plugin:
WordPress provides various plugins like “Redirection” and “Simple 301 Redirects” that simplify the process of adding redirect rules. Install and activate the plugin of your choice from the WordPress dashboard.
Step 3: Access the Redirect Settings:
Once the plugin is activated, navigate to its settings page usually found under the “Tools” or “Settings” tab in the WordPress dashboard.
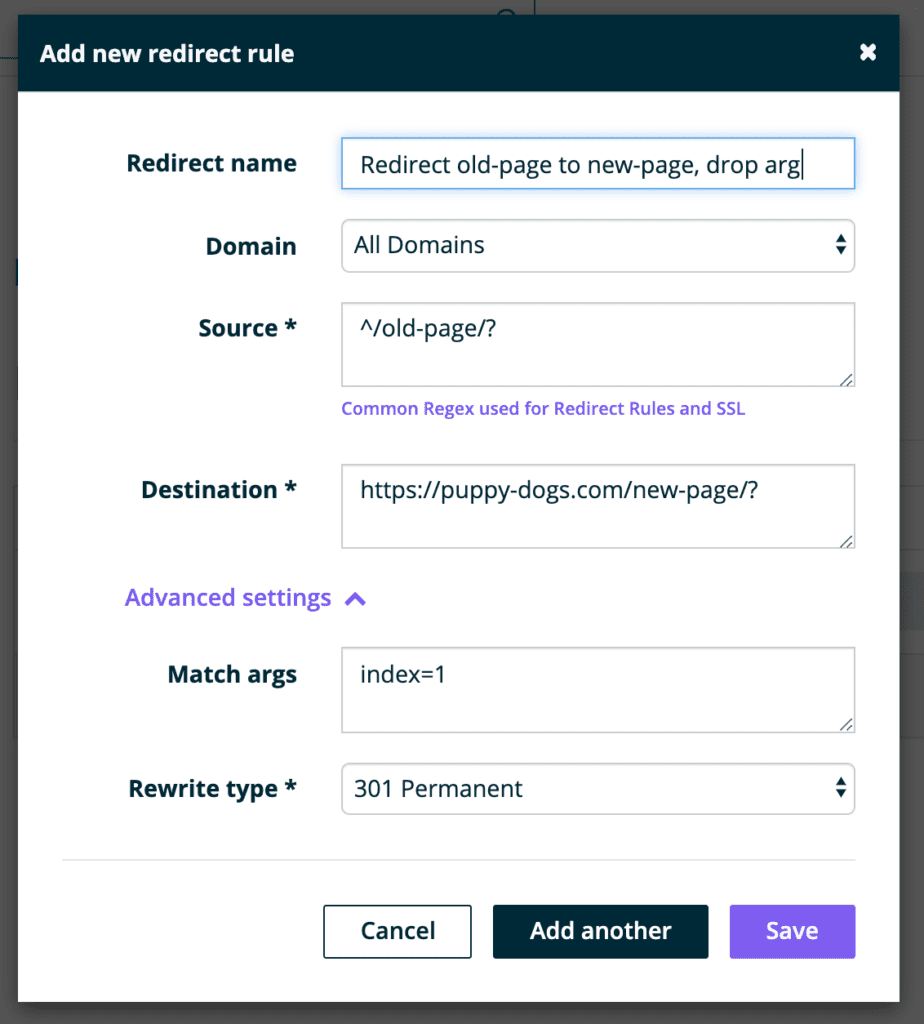
Step 4: Add New Redirect Rule:
Click on the option to add a new redirect rule. You’ll typically need to provide the source URL (the old URL you want to redirect) and the destination URL (where you want the traffic to be directed).
Step 5: Choose Redirect Type:
Select the appropriate redirect type (e.g., 301, 302) from the dropdown menu. Remember to choose wisely, especially for permanent redirects, as they can significantly impact SEO.
Step 6: Save the Redirect Rule:
After filling in the necessary details, save the redirect rule. The plugin will now handle the redirection process automatically whenever someone accesses the specified URL.
For Expert Users:
Experienced WordPress users may prefer more advanced methods of adding redirect rules, such as editing the .htaccess file directly. Here’s how:
Step 1: Access .htaccess File:
Using an FTP client or the file manager provided by your hosting provider, locate and access the .htaccess file in the root directory of your WordPress installation.
Step 2: Backup .htaccess File:
Before making any changes, it’s essential to create a backup of the .htaccess file. This ensures that you can revert to the previous configuration if anything goes wrong.
Step 3: Add Redirect Rules:
To add redirect rules, you can use Apache’s mod_rewrite module. Here’s an example of a 301 redirect rule:
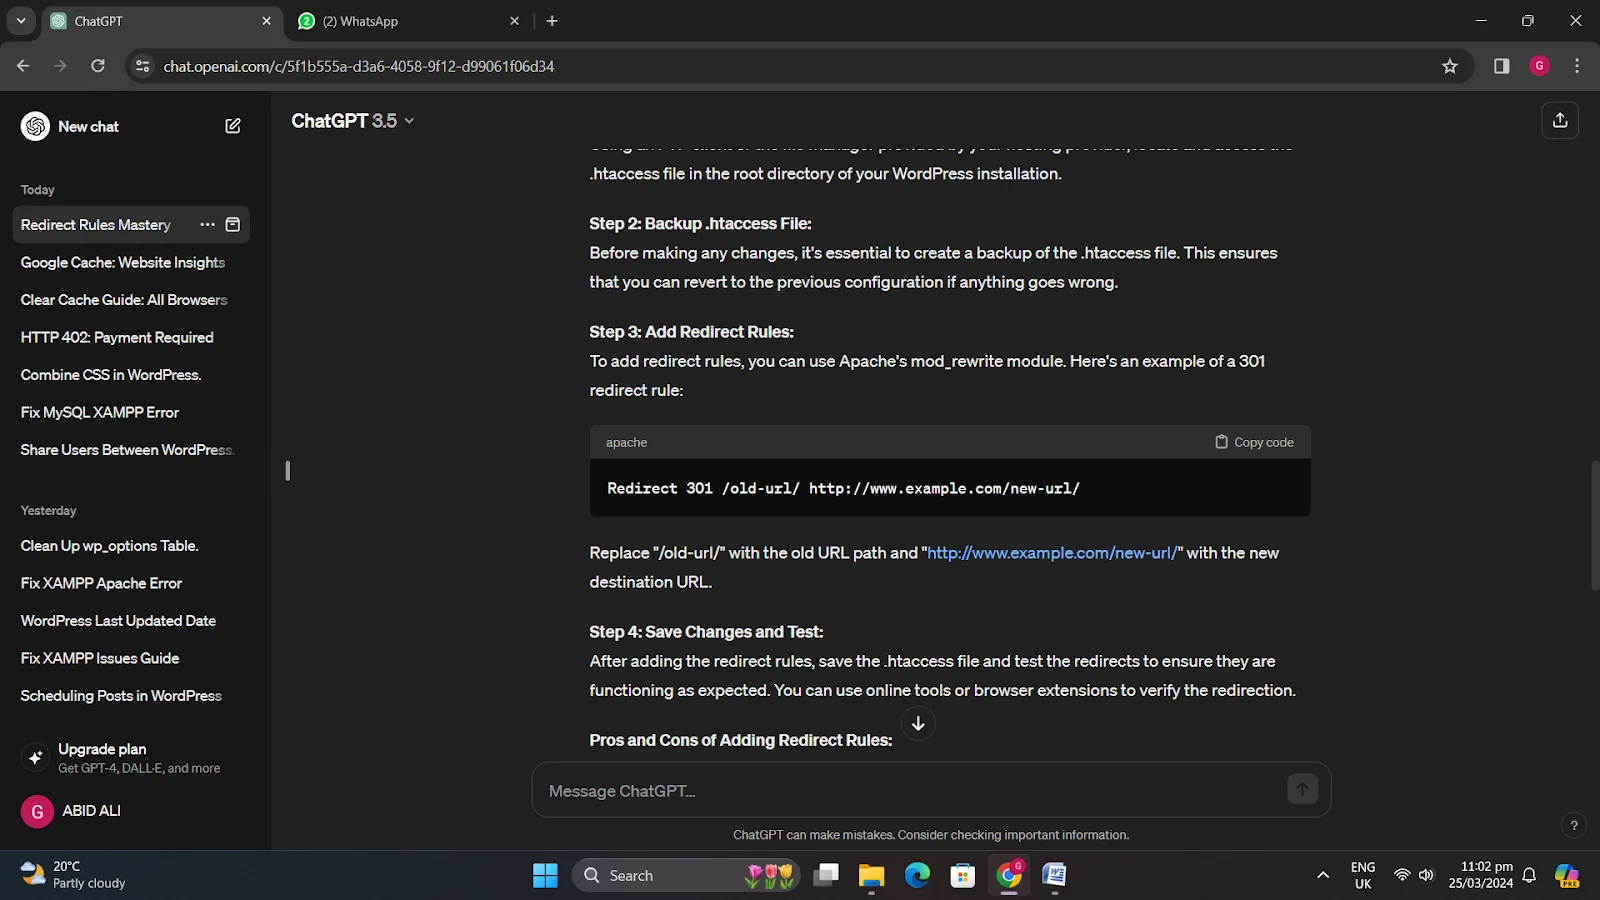
Replace “/old-url/” with the old URL path and “http://www.example.com/new-url/” with the new destination URL.
Step 4: Save Changes and Test:
After adding the redirect rules, save the .htaccess file and test the redirects to ensure they are functioning as expected. You can use online tools or browser extensions to verify the redirection.
Pros and Cons of Adding Redirect Rules:
Pros:
1. Improved User Experience:
Users are seamlessly redirected to the desired content, reducing frustration and increasing engagement.
2. Enhanced SEO Performance:
Proper redirection preserves SEO equity and prevents 404 errors, ultimately improving search engine rankings.
3. Flexible Management:
With plugins or manual methods, redirect rules can be easily managed and updated to reflect changes in site structure or content.
Cons:
1. Potential for Errors:
Incorrectly configured redirect rules can lead to unexpected behavior or broken links, negatively impacting user experience and SEO.
2. Plugin Dependency:
Relying on plugins for redirection adds overhead and dependency on third-party tools, which may affect site performance or compatibility.
3. Complexity for Manual Methods:
Editing .htaccess files or server configurations requires technical expertise and caution to avoid disrupting site functionality.
Conclusion:
In conclusion, adding redirect rules to your WordPress site is essential for maintaining site integrity, enhancing user experience, and improving SEO performance.
Whether you’re a beginner or an expert user, understanding the significance and implementation of redirect rules is crucial for effective site management.
By following the step-by-step guides provided and weighing the pros and cons of add redirect rules to your WordPress site, you can efficiently manage redirection and ensure a seamless browsing experience for your visitors.