Your PHP installation appears to be missing the MySQL extension, is a common issue that many users face after installing WordPress. This happens when the PHP installation on the server is missing the required MySQL extension that is required by WordPress to make connections to the MySQL database it is connected to.
Worry not, this is quite easy to fix. There are different ways to fix this depending on the kind of hosting plan you are on.
How to Fix on Shared Hosting?
If you have installed WordPress on a shared hosting account, this error is most likely being caused by the MySQL extension being disabled on your hosting account. In order to enable it, please do the following steps.
Step 1: Login to your cPanel account.
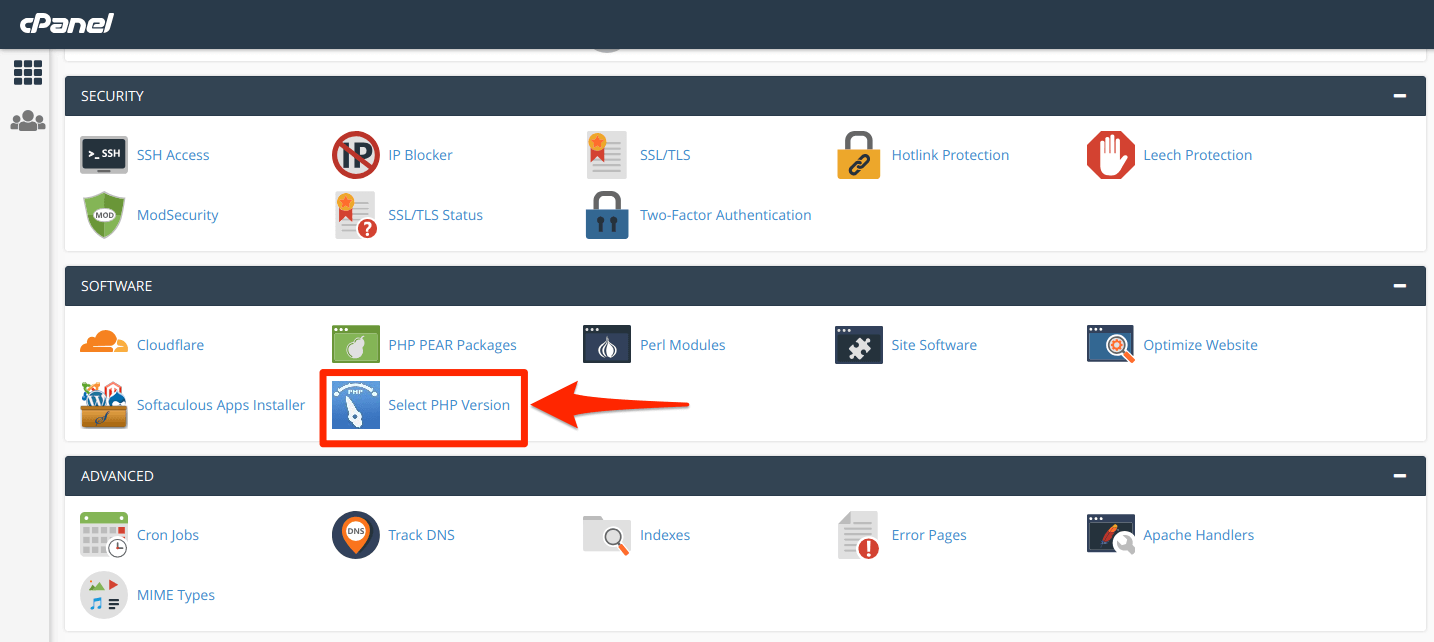
Step 2: Look for the option “Select PHP Version” & click on it.
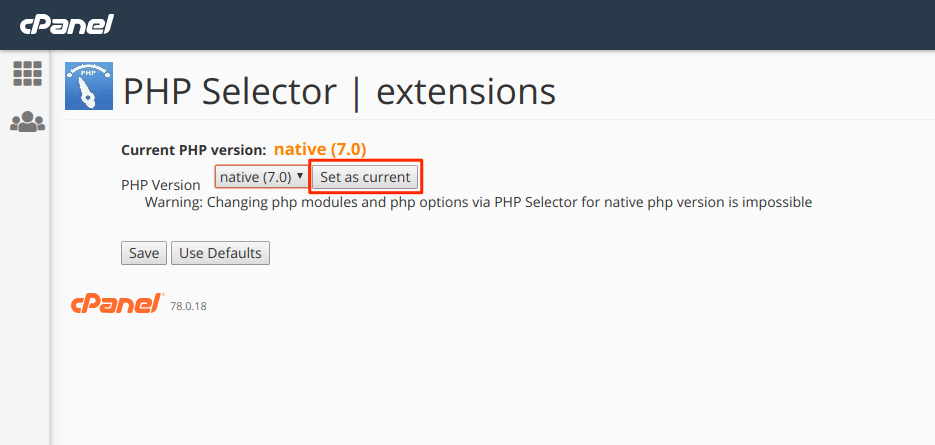
Step 3: Once there, change the PHP version to Current from the dropdown as shown below.
Step 4: Once you have selected the PHP version as current, tick on the option that says “mysqli” and/or “mysqlnd” from the options presented and click save. 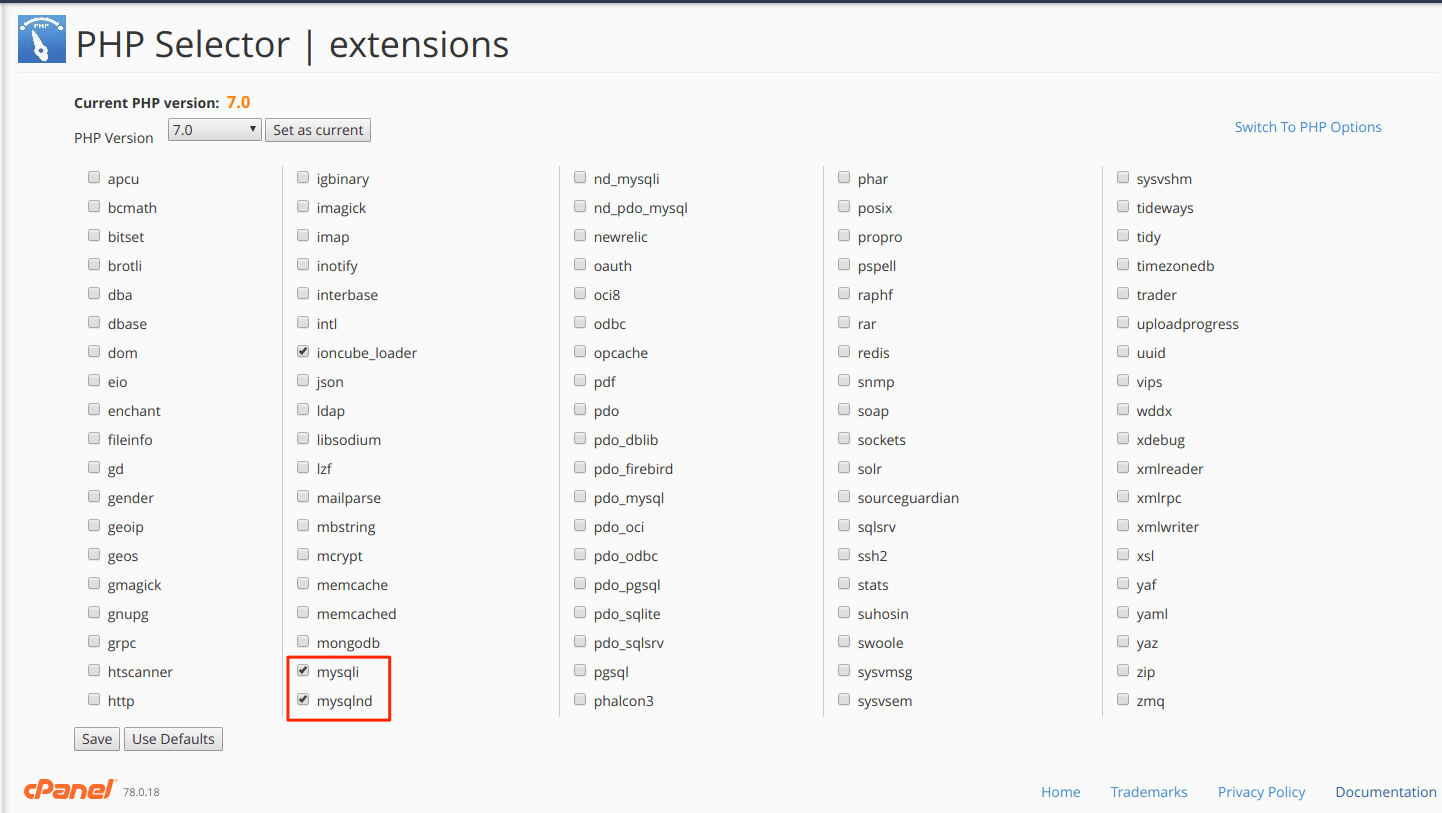 Step 5: Check your WordPress installation and the error should be gone.
Note: If your cPanel does not have the Select PHP Version option, you will have to contact your web hosting provider to have it enabled for you. All of Host4Geeks’ web hosting plans already come with this feature enabled.
How to Fix on a cPanel Server?
If you are on a cPanel server that you have root access to. You will need to enable and install the MySQL PHP extension using the EasyApache 4 interface in your WHM.
Step 1: Login to your WHM as root.
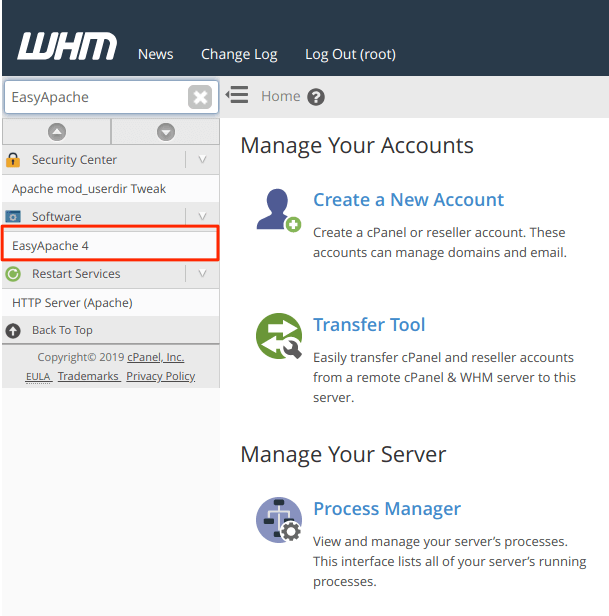
Step 2: Search for the option “EasyApache 4” & click on it. You will see a page as below:
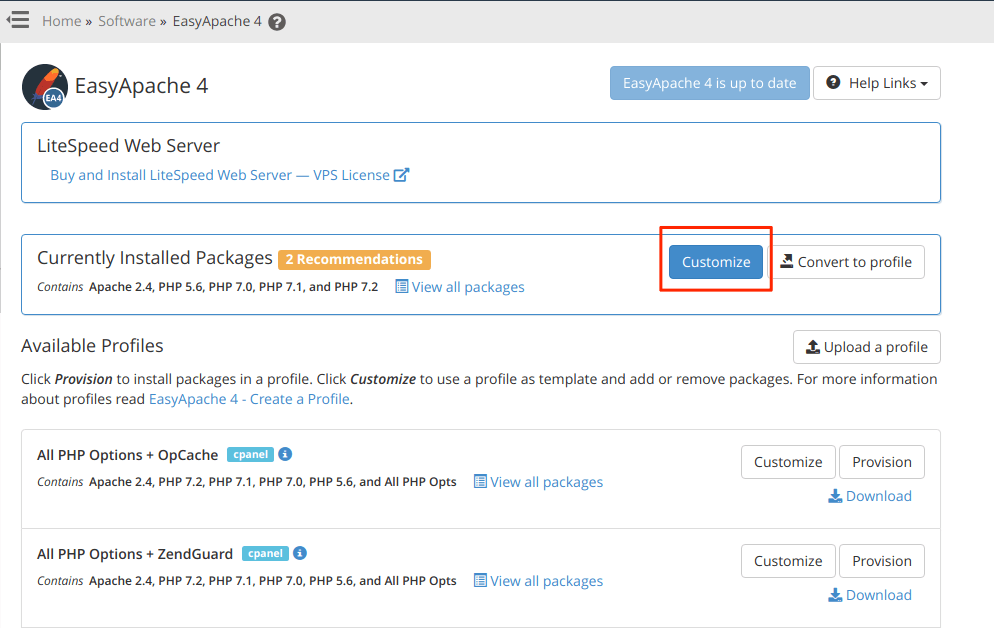
Step 3: You will see a highlighted box “Currently Installed Packages”, click on the ‘customize’ button as shown below:
Step 4: Once there, select ‘PHP Extensions’ and in the search box type mysql, you will see the mysqlnd options, as seen below:
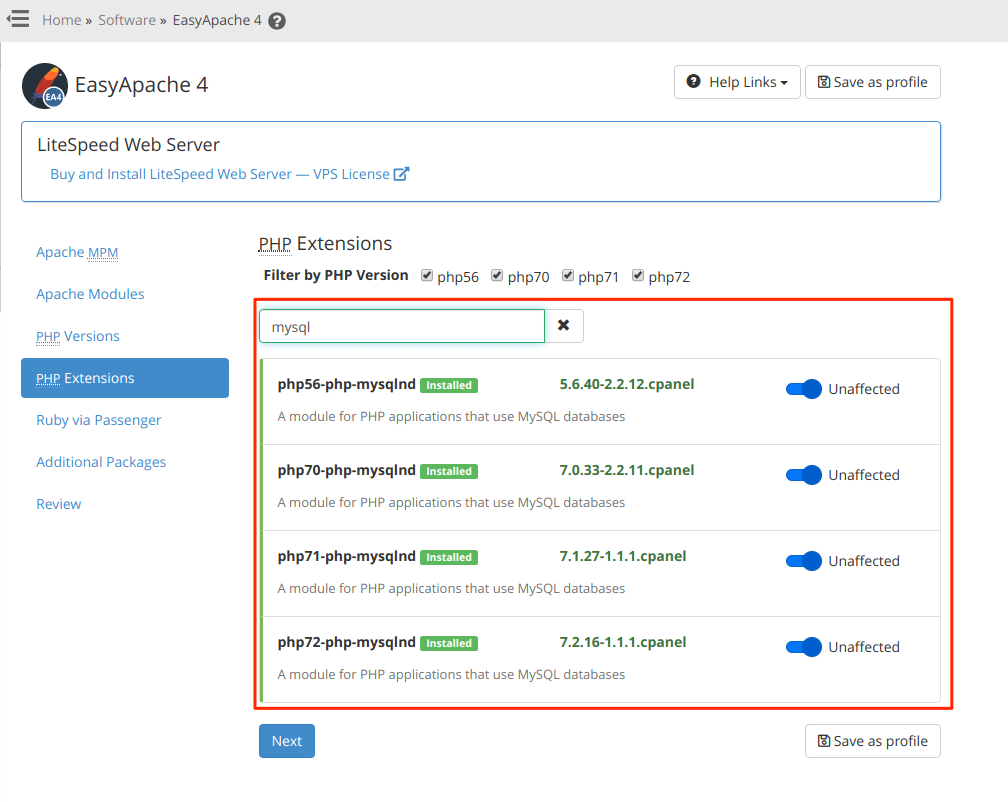
Step 5: Select the required mysqlnd extension as per your requirement of the PHP versions. You can simply select all the version that are displayed, this will cause no problems.
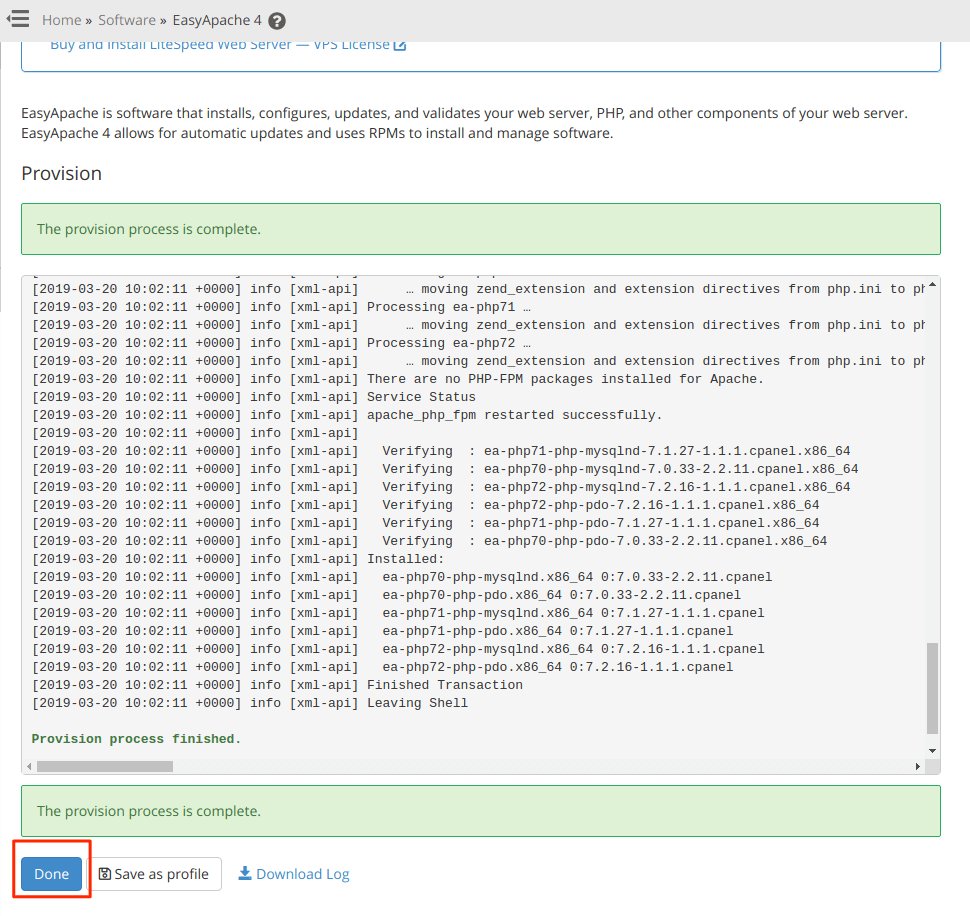
Step 6: Once you have select the mysqlnd extensions there click on “Review”, scroll down and click on “Provision” button. you will see the page as below:


Step 7: Once finished, click on done and check your WordPress installation and the error should be gone.
How to Fix on a CentOS Server?
If you are running your WordPress site on a CentOS VPS without any kind of control panel. Your first step would be to check the PHP version that you are running.
# php -v
Will show you the PHP Version you are currently running. In our case, this is PHP 7.0. We need to install the PHP-MySQL extension for PHP 7.0. We can do this using the following command:
# yum update
# yum install php70w-mysql
Once installed, restart your web server, for Apache it is:
systemctl restart httpd
Or
service httpd restart
After restarting, your WordPress site should work properly.
How to Fix on a Ubuntu Server?
If you are running your WordPress site on an Ubuntu VPS without any kind of control panel. Your first step would be to check the PHP version that you are running.
# php -v
Will show you the PHP Version you are currently running. In our case, this is PHP 7.0. We need to install the PHP-MySQL extension for Php 7.0. We can do this using the following command:
apt-get update
apt-get install php7.0-mysql
Once installed, restart your web server, for Apache, it is:
service httpd restart
After restarting, your WordPress site should work properly.
I hope this guide was able to help you resolve the issue with your WordPress site, if you have any questions please feel free to ask them in the comments section below.
If issues like these are not something you want to be dealing it, take a look at our managed WordPress hosting plans that let you run your business without having to worry about your server or web hosting.

