Renaming a database in cPanel is not directly supported through the cPanel interface. Instead, you will need to use phpMyAdmin or command-line tools to accomplish this task. Here’s a detailed guide on how to rename a database using phpMyAdmin for Host4Geeks users:
Step-by-Step Guide to Renaming a Database in cPanel
1. Log into cPanel
- Access cPanel
Open your web browser and enter the cPanel login URL provided by Host4Geeks. This is typically something like https://yourdomain.com/cpanel or https://yourdomain.com:2083.
- Login Credentials
Enter your cPanel username and password to log in.
2. Back Up the Database
Before making any changes, it is crucial to back up the database to prevent data loss.
- Backup Wizard
Use the Backup Wizard or the phpMyAdmin export feature in cPanel to create a backup of your database.
In phpMyAdmin, select the database you want to rename, go to the “Export” tab, choose the export method (Quick or Custom), and click “Go” to download the SQL file.
3. Create a New Database
- Navigate to the Databases Section
Scroll down to the “Databases” section and click on the “MySQL® Databases” icon.
- Create New Database
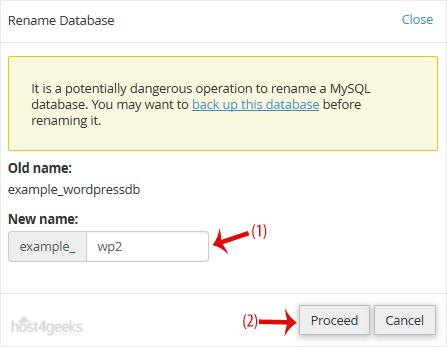
In the “Create New Database” field, enter the new name for your database and click “Create Database”. This new database will act as the renamed version of your old database.
4. Copy Data to the New Database
- Access phpMyAdmin
In cPanel, go to the “Databases” section and click on the “phpMyAdmin” icon.
- Select the Original Database
In phpMyAdmin, select the original database you want to rename.
- Export Data
Go to the “Export” tab, select the export method (Quick or Custom), and export the data as an SQL file.
- Select the New Database
After exporting, select the new database that you created with the new name.
- Import Data
Go to the “Import” tab, choose the exported SQL file from your computer, and click “Go” to import the data into the new database.

5. Reconfigure Database Connections
- Update Configuration Files
Update any application configuration files to point to the new database name. This includes updating the database name, username, and password in your application’s configuration settings.
- Check Database Users
Ensure the database user has the necessary privileges for the new database. You may need to reassign users and set privileges for the new database.
6. Test the New Database
- Verify Connections
Test your applications to ensure they can connect to the new database and function correctly.
- Check Data Integrity
Verify that all data has been successfully copied and that there are no issues with the new database.
7. Delete the Old Database
Once you have confirmed that the new database is functioning correctly and all data has been successfully migrated, you can delete the old database to free up space and avoid confusion.
- Navigate to the MySQL® Databases Section
In cPanel, go back to the “MySQL® Databases” section.
- Delete Old Database
Find the old database in the list under “Current Databases” and click the “Delete” link next to it. Confirm the deletion when prompted.
Additional Tips for Database Management
- Backup Regularly: Regularly back up your databases to prevent data loss in case of accidental deletion or corruption.
- Use Strong Passwords: Always use strong, unique passwords for your database users to enhance security.
- Monitor Database Usage: Keep an eye on your database usage and performance to ensure optimal functionality of your applications.
Troubleshooting
- Import Errors: If you encounter errors during the import process in phpMyAdmin, check the SQL file for any syntax issues or compatibility problems.
- Connection Issues: Ensure that your application’s configuration files are updated with the correct new database name and credentials.
Contacting Support
For any issues or additional help, you can reach out to Host4Geeks customer support through:
- Support Portal: Access the support portal from your Host4Geeks account.
- Live Chat: Use the live chat feature on the Host4Geeks website.
- Email: Send an email to the Host4Geeks support team.
By following these detailed steps, you can effectively rename a database in cPanel on Host4Geeks, ensuring minimal disruption to your applications and maintaining data integrity.