Optimizing a database is an essential task to improve the performance and efficiency of your web applications. Using phpMyAdmin in cPanel makes this process straightforward. Here’s a detailed guide on how to optimize a database via phpMyAdmin for Host4Geeks users:
Step-by-Step Guide to Optimizing a Database via phpMyAdmin in cPanel
1. Log into cPanel
- Access cPanel
Open your web browser and enter the cPanel login URL provided by Host4Geeks. This is typically something like https://yourdomain.com/cpanel or https://yourdomain.com:2083.
Enter your cPanel username and password to log in.
2. Navigate to phpMyAdmin
- Databases Section
Once you are logged into cPanel, scroll down to the “Databases” section.
Click on the “phpMyAdmin” icon to open phpMyAdmin in a new tab or window.
![]()
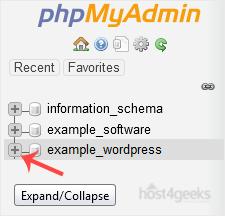
3. Select the Database
In phpMyAdmin, you will see a list of databases on the left sidebar.
- Choose Database
Click on the name of the database you want to optimize. This will open the database structure view, displaying all the tables within that database.
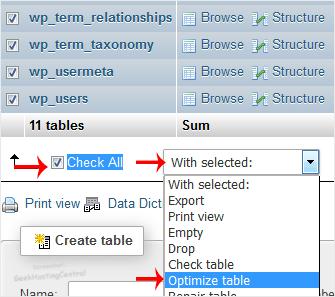
4. Optimize Tables
- Select Tables
In the structure view of your database, check the boxes next to the tables you want to optimize. You can select all tables by checking the box at the top of the list.
- With Selected Dropdown
Scroll down to the bottom of the table list. You will see a dropdown menu labeled “With selected:”.
- Optimize Table Option
From the dropdown menu, select “Optimize table”.
5. Execute Optimization
- Optimize Action
After selecting “Optimize table”, phpMyAdmin will execute the optimization command for the selected tables.
- Confirmation Message
You should see a confirmation message indicating that the tables have been optimized successfully. The message will usually show the SQL command executed (e.g., OPTIMIZE TABLE tablename“) and the status of each table.
Additional Tips for Database Optimization
- Regular Optimization: Perform regular optimization to maintain database performance, especially for frequently updated tables.
- Analyze Table: Consider using the “Analyze table” option to update the table statistics, which can help the MySQL optimizer make better decisions.
- Repair Table: If you suspect any corruption in your tables, use the “Repair table” option available in the same dropdown menu.
- Backup Before Optimization: Always back up your database before performing optimization or any other maintenance tasks to prevent data loss.
Troubleshooting
- Slow Performance: If your database is still performing poorly after optimization, consider other maintenance tasks such as indexing or examining slow queries.
- Errors During Optimization: If you encounter errors, review the error messages for specific issues. You might need to repair tables or check for storage engine problems.
- Large Databases: For very large databases, optimization might take some time. Ensure you have sufficient server resources and consider scheduling optimizations during off-peak hours.
Contacting Support
For any issues or additional help, you can reach out to Host4Geeks customer support through:
- Support Portal: Access the support portal from your Host4Geeks account.
- Live Chat: Use the live chat feature on the Host4Geeks website.
- Email: Send an email to the Host4Geeks support team.
By following these detailed steps, you can effectively optimize your database via phpMyAdmin in cPanel on Host4Geeks, ensuring better performance and efficiency for your web applications.