Checking for new emails in Outlook 2019 is a straightforward process. Below are detailed steps to ensure you stay updated with your latest messages.
1. Open Outlook 2019
- Locate the Outlook Icon: Find the Outlook 2019 icon on your desktop or in your Start menu.
- Double-click the Icon: Open the application by double-clicking the Outlook icon.
![]()
2. Navigate the Outlook Interface
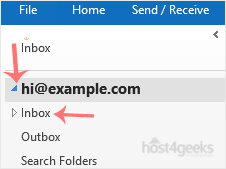
- Inbox: Once Outlook is open, you will typically be taken directly to your Inbox.
- Folder Pane: On the left side, you will see a folder pane with your email accounts and folders like Inbox, Sent Items, Drafts, etc.
- Reading Pane: The middle section is where the list of emails in the selected folder is displayed.
- Reading Pane: The right section displays the content of the selected email.
3. Manually Check for New Emails
- Send/Receive Button: To manually check for new emails, click the “Send/Receive All Folders” button located in the Send/Receive tab on the Ribbon at the top of the screen.
- Shortcut: You can also press F9 on your keyboard to trigger a Send/Receive action.
4. Automatic Email Retrieval
- Automatic Send/Receive Settings: By default, Outlook is configured to automatically check for new messages at regular intervals (usually every 30 minutes). To adjust these settings:
- Click on the File tab in the upper-left corner.
- Select Options from the menu.
- In the Outlook Options window, select Advanced.
- Scroll down to the Send and Receive section and click on Send/Receive….
- In the Send/Receive Groups window, you can set the interval for how often Outlook checks for new messages.
5. Checking Specific Folders
- Different Folders: If you have multiple folders (e.g., different email accounts, subfolders within the Inbox), ensure you select the specific folder to check for new emails there.
- Folder Navigation: Use the folder pane on the left to navigate to the desired folder.

6. Notifications for New Emails
- Desktop Alerts: Outlook provides desktop alerts for new emails. To ensure these are enabled:
- Go to the File tab.
- Select Options.
- In the Mail section, look for the Message arrival section and check the box for Display a Desktop Alert.
- Sound Notifications: You can also enable sound notifications in the same section if they are not already enabled.
7. Troubleshooting
- Internet Connection: Ensure your computer is connected to the internet.
- Email Server Settings: Verify that your email account settings are correctly configured. This can be done through the Account Settings option in the File tab.
- Check for Updates: Make sure your Outlook 2019 is up to date. Go to File > Office Account > Update Options > Update Now to check for and install any available updates.
Summary
- Open Outlook 2019 and navigate to your Inbox.
- Use the Send/Receive button or press F9 to manually check for new emails.
- Adjust automatic send/receive settings to suit your preferences.
- Navigate different folders to ensure all emails are checked.
- Enable desktop alerts and sound notifications for new emails.
- Troubleshoot by checking internet connection, email server settings, and ensuring Outlook is updated.
Following these steps will help you efficiently check and manage your emails in Outlook 2019.